|
SEAVAX - WATER TANK BRICKS & MORTAR
BRICKS & MORTAR - CARRIAGE - DRAINAGE - FACILITIES - FILTRATION - GLASS & PAINT - GANTRY - GIMBALS - HATCHES - HYDRODYNAMICS HISTORY - INSTRUMENTS - LABORATORY - LAMINATING - LOGISTICS - OUR TEST TANK - PROOFING - REVIEWS - SCREEDING - SEAVAX TEST VIDEOS - SLUICE GATE - SOLAR BATTERIES - WAVE MAKING - WIND MACHINE
|
|||
|
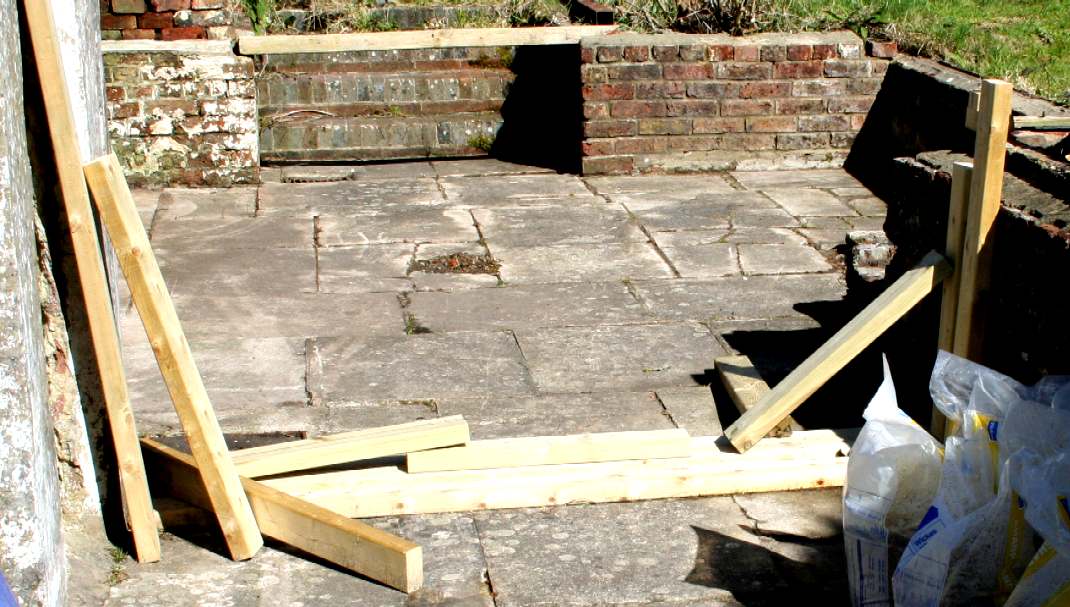
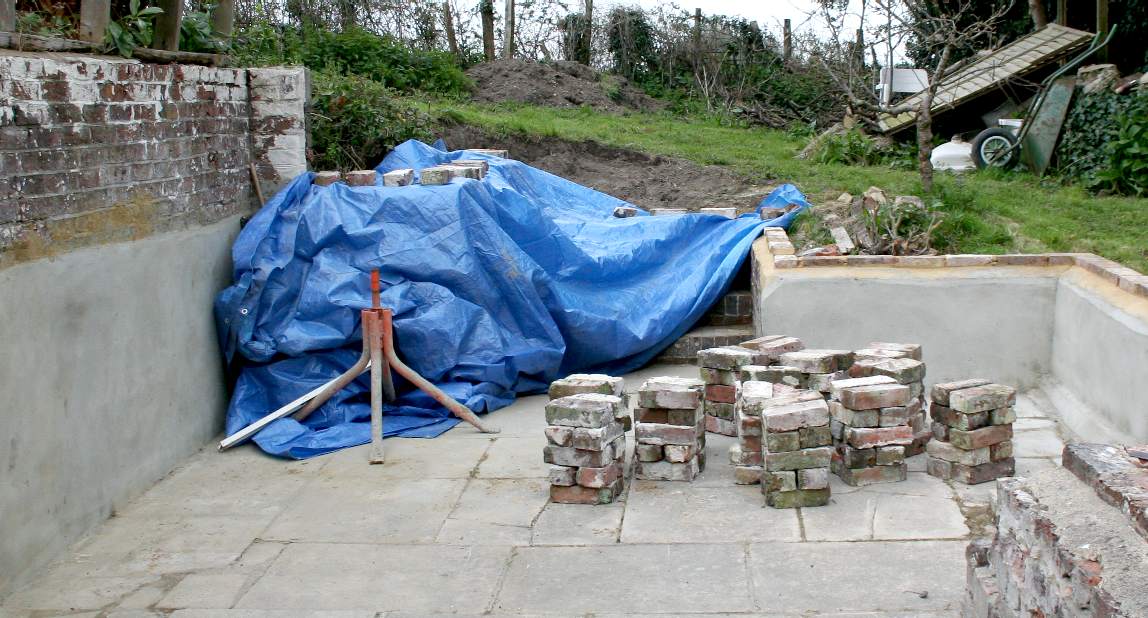
SITE LOCATION - Finding suitable facilities for research on a low budget is extremely difficult. This is how our tank looked once the site was cleared of most of the rubbish and weeds. In the foreground are cut timbers for a barrier that will hold water into this subterranean courtyard. Where the gate is removable, it is called a sluice gate. Copyright © April 2016, all rights reserved. You will need permission from Bluebird Marine Systems Ltd to reproduce this photograph.
We are converting a convenient subterranean location to give us a test tank. The walls are porous brick of some age, that will need re-rendering to give us smooth sides that don't leak. We will install a sluice gate as seen in the pictures above as several pieces of cut timbers, so that we do not have to build any permanent brick wall additions. This will also speed up the process and give us the ability to empty the tank for cleaning and other access, rather quickly.
Subsurface brick courts or yards are particularly suitable for conversion into water tanks with a little creative thinking. Apart from the woodworking and welding skills needed to put this unit together, the ability to lay bricks and coat them with a waterproof mortar is essential. But bricklaying and rendering are art-forms that elude many. To be an effective brickie, you have to be fit and weather resistant. You also have to have a keen eye and knowledge of the styles and methods of returns, bonds and more.
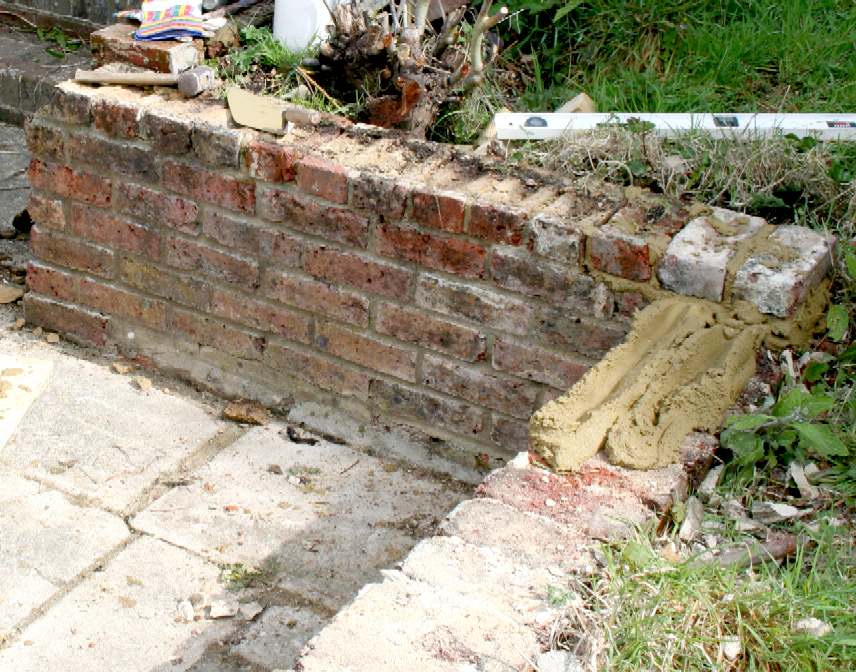
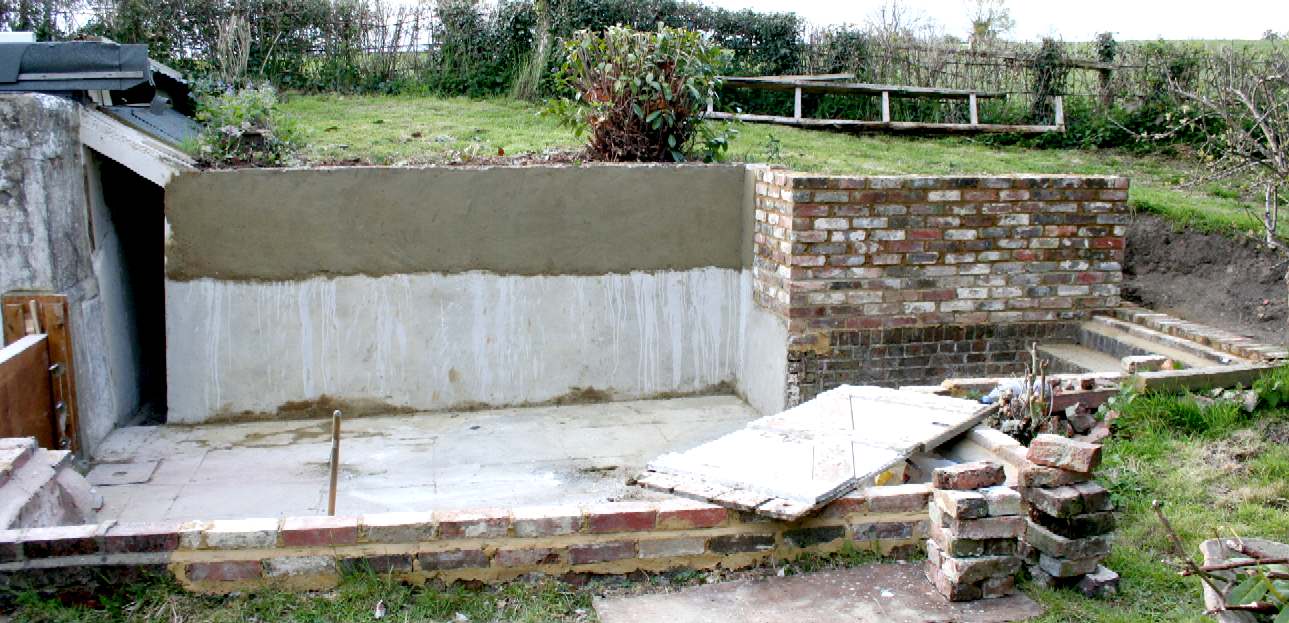
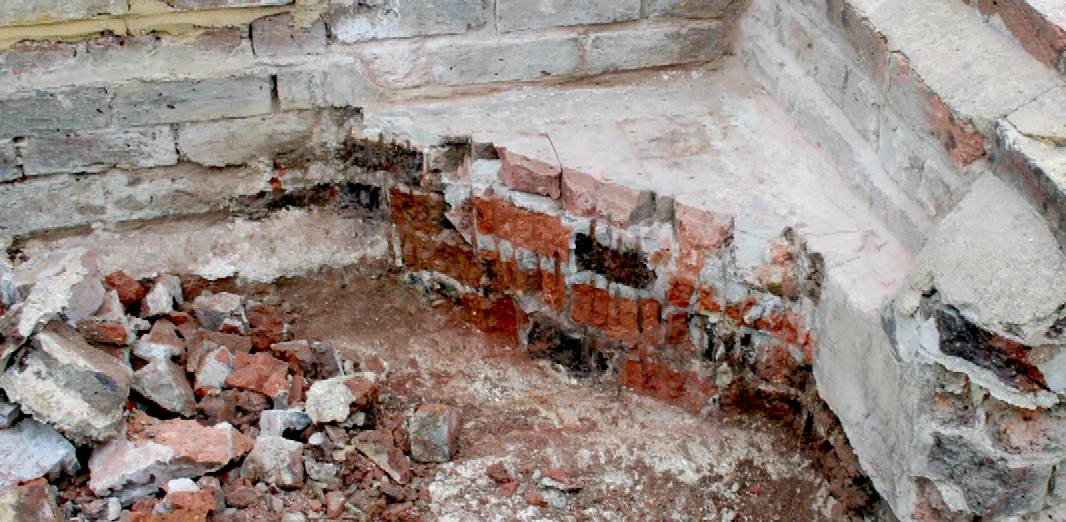
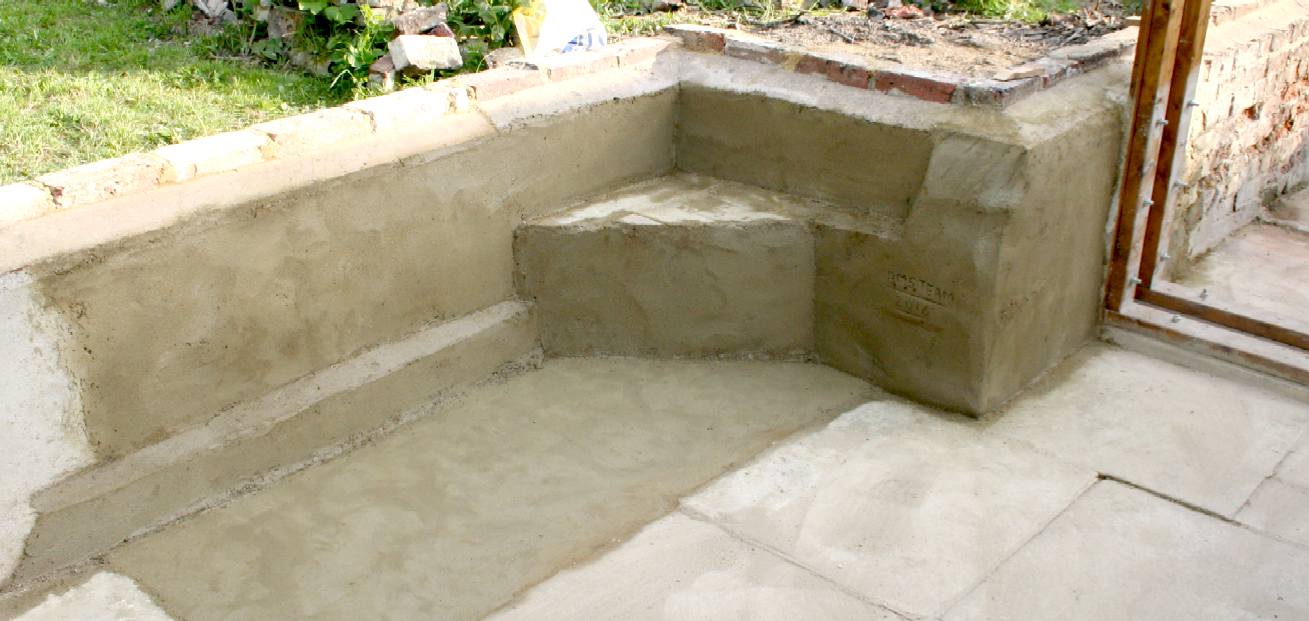
BEFORE & AFTER - On the left you can see the original brickwork chipped back to a solid layer. On the right, the wall has been built back up and a waterproof render coat applied. These walls were originally rendered, though the use of the original structure is not clear, judging from the high quality brick steps, it was probably an outbuilding or small cottage, though it may have been a greenhouse at some point.
OUR EXPERT - When we need any serious building work done, Terry is the man for the job. Terry is very fond of the Sussex countryside and keeping it just the way it is. If that means research into ways to curb climate change and poisoning our fish stocks, he is more than willing to lend a hand. Terry also likes to keep himself fit and promotes water sports by way of a hobby, hence the Miss Ocean 'T' shirt.
Water weighs 62.4 pounds per cubic foot, or 1000kg per cubic meter. For this reason the liquid takes a lot of containing, but with earth behind the retaining walls to counteract the hydraulic pressure, the real challenge is just to prevent leaks to earth. These are usually pinhole leaks.
ANDERSON SHELTER - We know that during the 2nd World War, the building to the far left was designed to withstand bomb attacks. It is dual walled. The core room is built of brick and then there is a secondary (blast) wall made of concrete that is reinforced with steel beams. the unit was rendered inside and out. This presents us with a little problem: how to seal up the open space between the inner and outer walls. Note the timber frame on top of the retaining wall. This is rotten and needed to be replaced (see below). Copyright © April 17 2016, all rights reserved. You will need permission from Bluebird Marine Systems Ltd to reproduce this photograph.
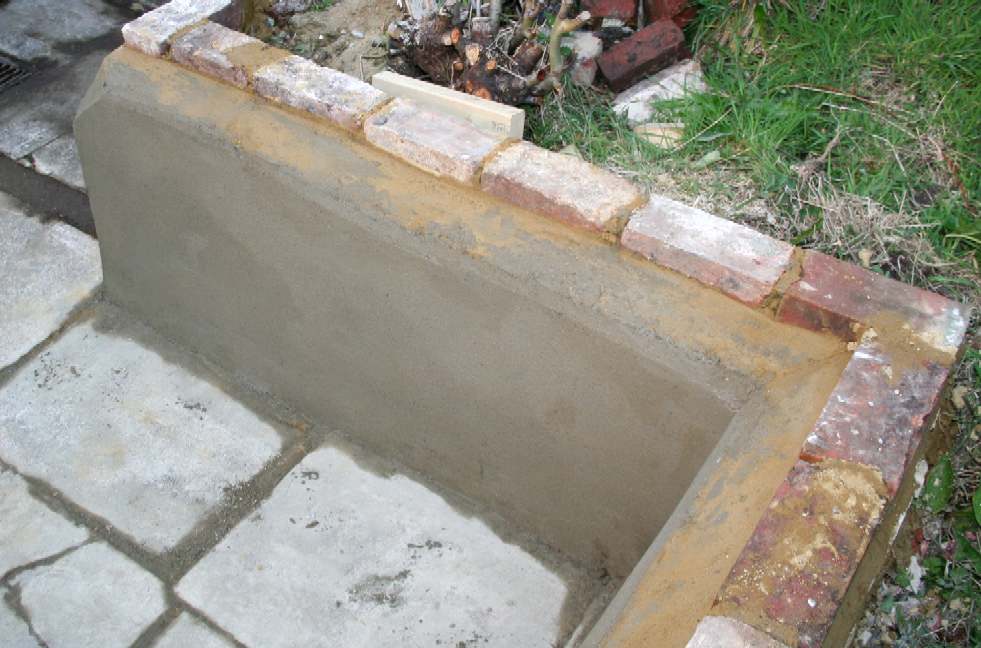
Converting an existing structure in the way we are, will give us formidable test tank facilities at a fraction of the cost of other government or academic units. From the relics we dug up and the quality of the brickwork on the steps, it seems this unit may have been a cottage before the MOD converted to a radio outpost in World War Two. Our tank is just the right size for the 1/20th proof of concept model - and that includes for a 1/4 of a hull (length) of a bulk carrier to the same scale as the SeaVax, both in the tank at the same time.
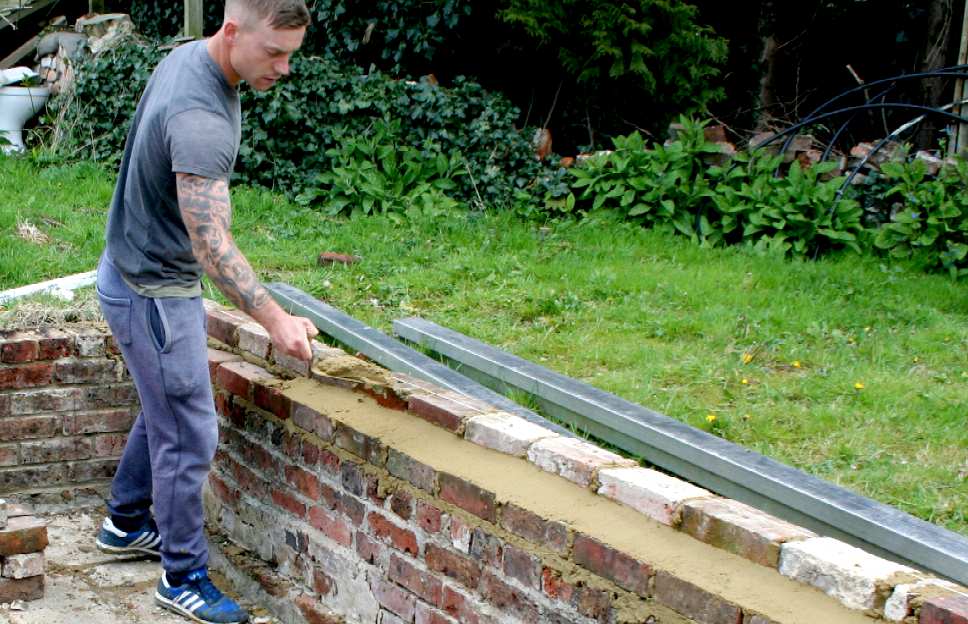
STRAIGHT - You can see the string line that Terry is working to. Brick laying is about consistency and levels. The two basic tools are a line and a level. April 17 2016. Copyright © April 17 2016, all rights reserved. You will need permission from Bluebird Marine Systems Ltd to reproduce this photograph.
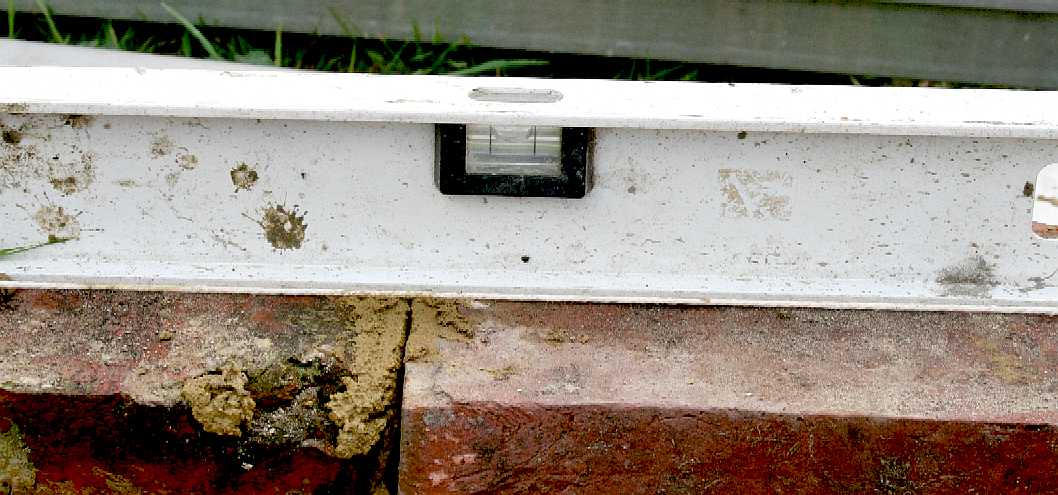
ON THE LEVEL - A good spirit level is essential in building. Basic equipment is all that is needed to build the most complex of buildings. It's not what you've got, it is how you use it. Copyright © April 17 2016, all rights reserved. You will need permission from Bluebird Marine Systems Ltd to reproduce this photograph.
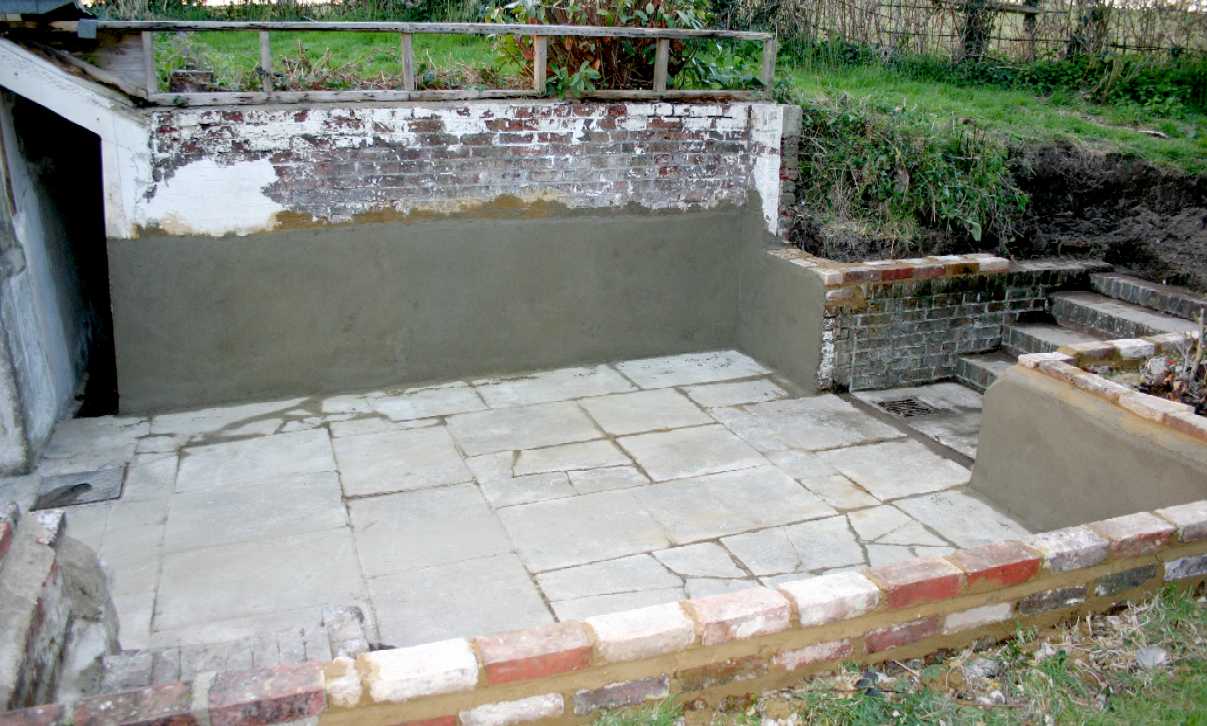
We can include wind and wave testing in a very compact unit. In this case as we have solar water heaters close by, we can also heat the water to make it more comfortable for our engineers to conduct their tests. this will be useful when filming underwater.
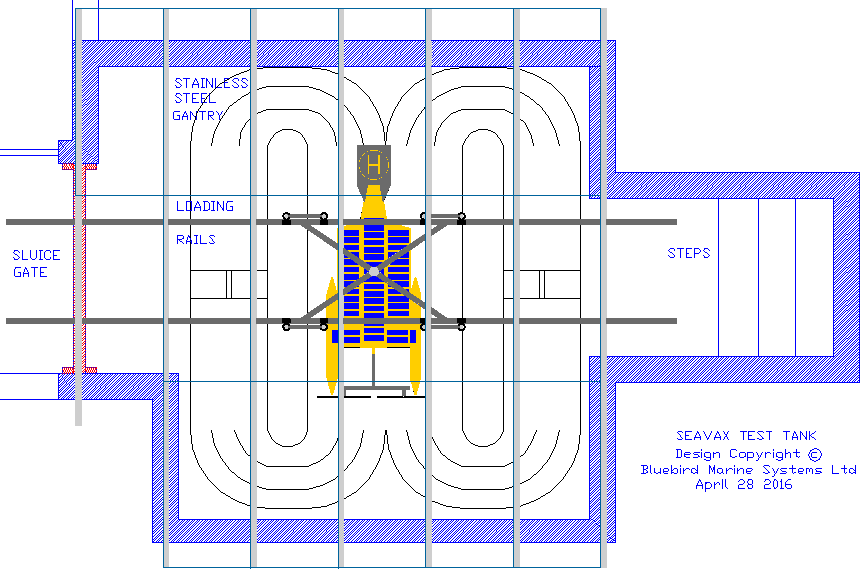
Our tank if of the re-circulating type, meaning that the vessel and carriage remain stationary, while the water moves around the tank. In tow tanks, it is the other way around. Because of the shape of our tank, we need two matched low volume pumps to re-create conditions at sea and in rivers applicable to waste collection.
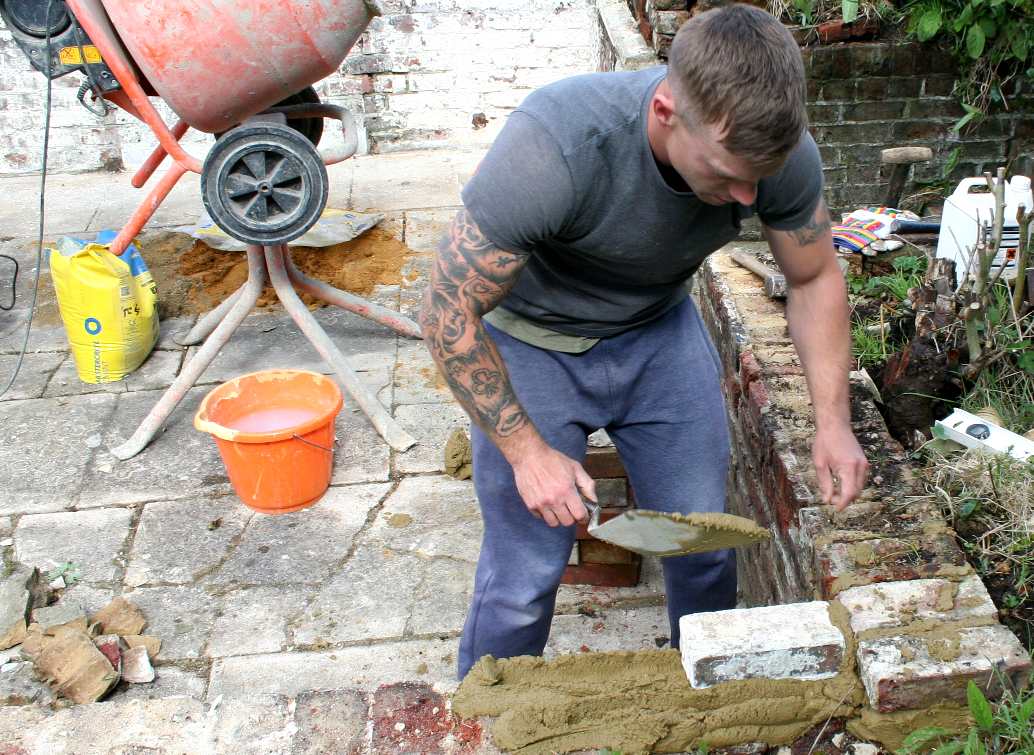
TERRY AT WORK - He does not hang about this bloke. It took all of the other team members to clean ahead of him. We are using the original bricks from other parts of the complex that have fallen down, etc. Terry is one of the fittest blokes in Eastbourne. Copyright © April 17 2016, all rights reserved. You will need permission from Bluebird Marine Systems Ltd to reproduce this photograph.
TEST PIECE - This is the machine that it is all about. It's just 2.2 meters long, but big enough to tell us how the full size development SeaVax will fair in adverse conditions.
STRING LINE - Cement is only useable for so long, that is why it is important to work quickly. In order to do that you need everything set up and in the right place. A string line makes it easy for a brick layer to get a level wall - without have to constantly check with a spirit level. Copyright © April 17 2016, all rights reserved. You will need permission from Bluebird Marine Systems Ltd to reproduce this photograph.
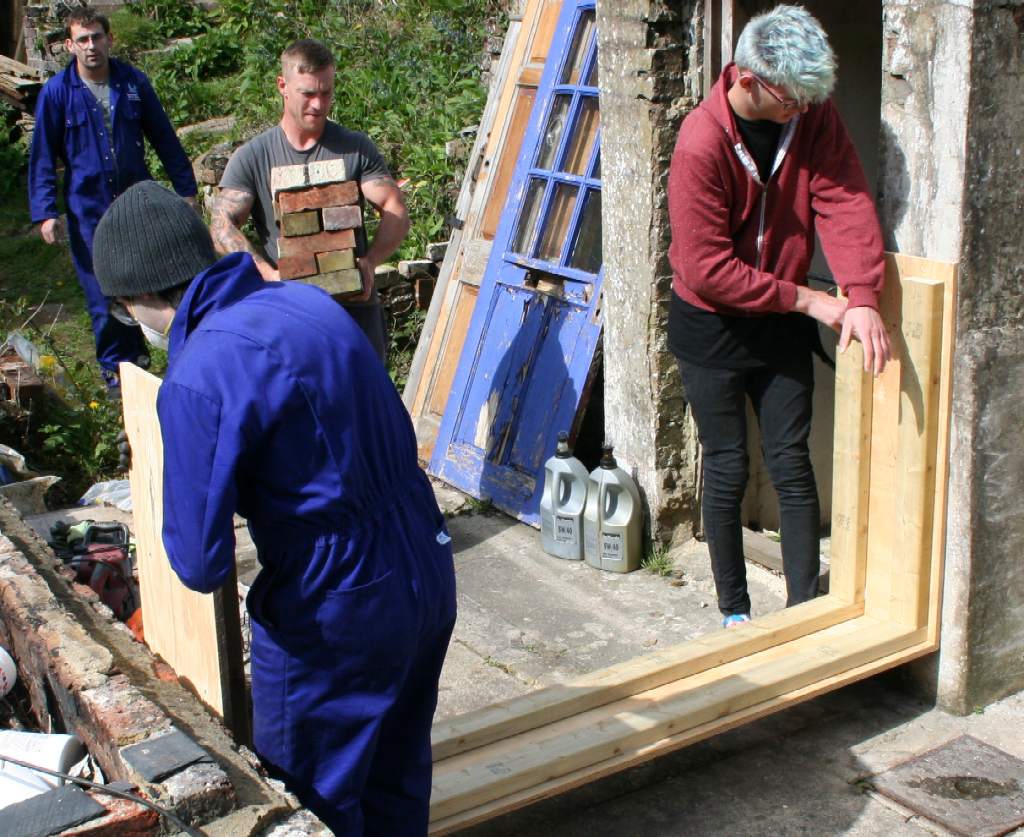
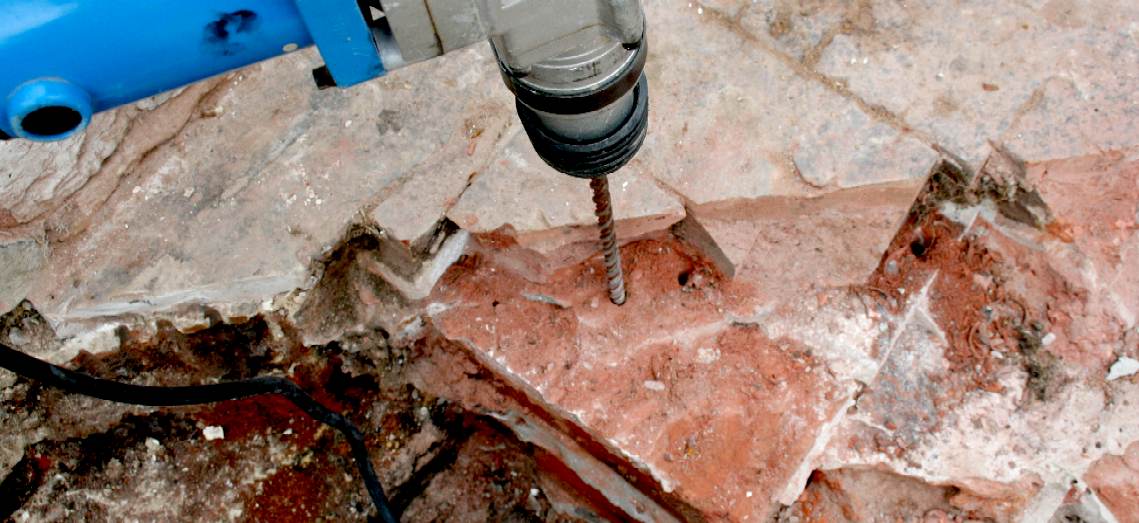
PERFECT FIT - Ross (left) and Jamie (right) slide the frame for the sluice gate into place. When calculating pressure on the sluice gate, it helps to mentally divide the height into convenient slices of one foot (if working in imperial - or 30cm if working in metric). This will not give us a completely accurate result, but will give us a rule of thumb figure to design for - and of course we add in a generous margin of safety. The Pressure/Depth Equation in a fluid that is standing still is: the pressure p at depth h is the fluid’s weight-density (mass) w times h: p=wh. Our sluice gate will then have to cope with roughly 1,600lbs in calm conditions or as much as twice that in dynamic conditions (just to be on the safe side), so between .72 and 1.43 tons of load. The fixings securing the sluice gate frame to the walls, must be capable of taking those loads. We are using 13mm threaded rod as studs, cemented into the walls at 250mm centres to a depth of 200mm, to give us 16 fixings for the frame, so that each bolt has to handle between 100-200 lbs of force. In addition, the frame is cemented in place. Copyright © April 17 2016, all rights reserved. You will need permission from Bluebird Marine Systems Ltd to reproduce this photograph.
FUNGICIDE - We used this fantastic 15 litre backpack to make the job of cleaning off the moss and other flora a whole lot quicker. You pump this little beauty as you go. No need to stop until the whole tank is used - and yes we did use the whole tank. This was an incredible bargain from the Range in Eastbourne. It will also take care of our weeds. Don't forget to wash up and rinse clean after use, ready for next time. It is a never ending battle against weeds.
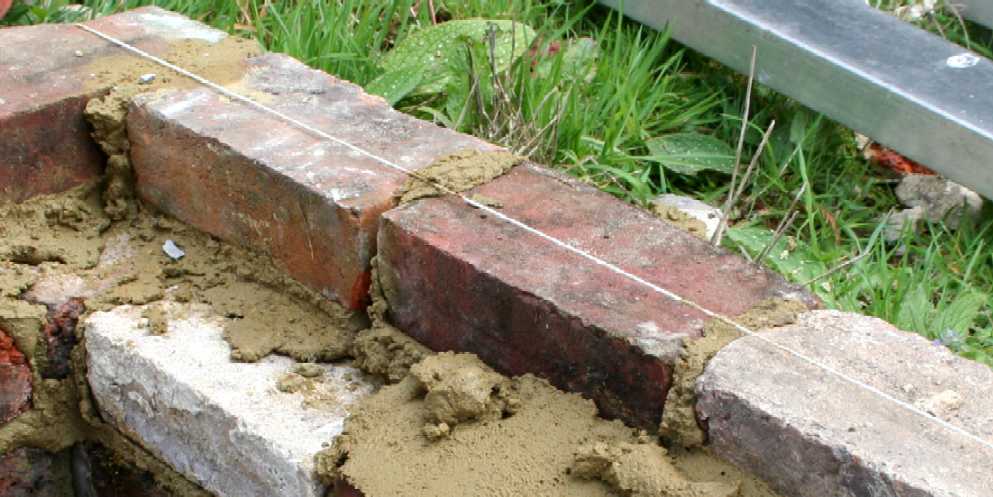
RECYCLING - Original bricks were used from other sections of the building that had not fared that well. Cleaning these bricks up is an art-form. Even with lime cement, you have to strike the mortar at the right angle or the brick might break. Quality reclaimed bricks of this age can run to £1 or more each, so we trod carefully. It had been spitting rain earlier, so we covered the newly laid bricks with a tarpaulin that also protects against frost. Copyright © April 24 2016, all rights reserved. You will need permission from Bluebird Marine Systems Ltd to reproduce this photograph.
STAIRWAY TO HEAVEN - We had to remove some on the redundant brick steps from the original cottage to be able to fit the recirculating guide vanes. First though we surveyed and recorded the architecture with copious photographs and detailed drawings. As you can see these steps end at a brick wall, meaning that the doorway that was once there has been bricked in. The brick plinth to the left of the steps was more than likely to mount a stone sink. Copyright © April 24 2016, all rights reserved. You will need permission from Bluebird Marine Systems Ltd to reproduce this photograph.
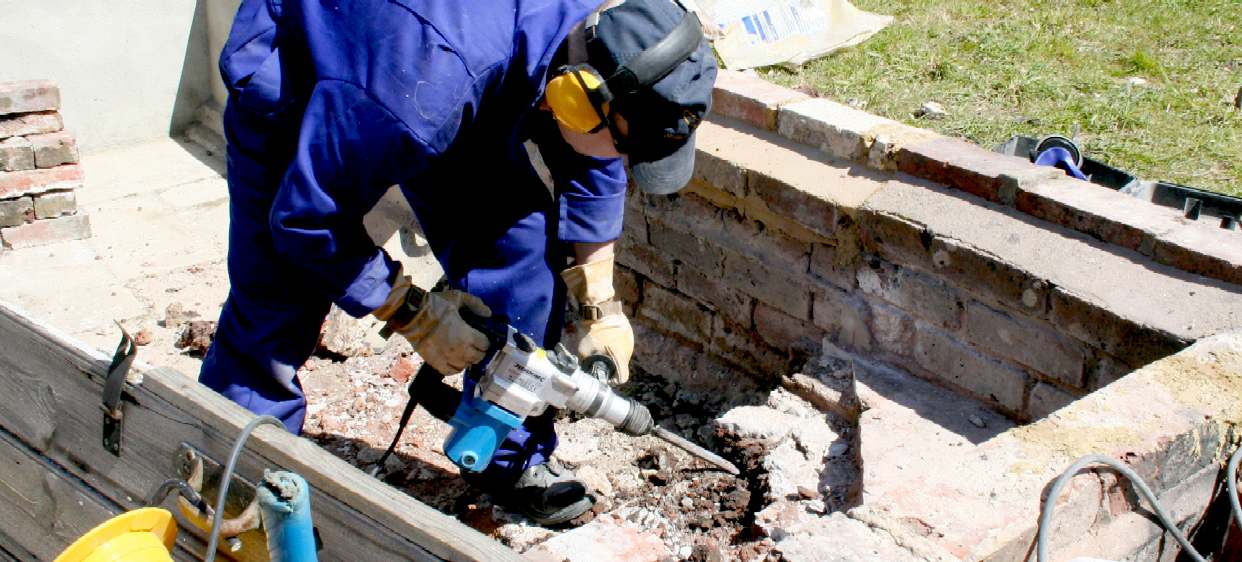
HAMMER SDS - Here we see Richard giving it some with a Special Direct System (SDS) drill. These heavy-duty hammer drills can be set to drill with very tough masonry bits, or to chisel, a bit like the road hammers, just smaller. The crew took it in turns to demolish the steps, but they were a mix of engineering bricks and a very strong mortar mix with sharp sand. In the end time defeated us, and it was time to clear up. Copyright © May 1 2016, all rights reserved. You will need permission from Bluebird Marine Systems Ltd to reproduce this photograph.
MORE CEMENT PLEASE - Terry calls for another gauge of cement. This area is a suntrap in the afternoons, so we relaxed health & safety a bit for our expert builder to cool down. Terry is also a martial arts enthusiast. Copyright © May 1 2016, all rights reserved. You will need permission from Bluebird Marine Systems Ltd to reproduce this photograph.
POINTING - Attention to detail. Once a wall is built, it is usual to point the joins. Terry uses a half round tool to make the job easy. He knows that this wall is likely to be rendered, but figures what the heck. Copyright © May 1 2016, all rights reserved. You will need permission from Bluebird Marine Systems Ltd to reproduce this photograph.
MORE RENDER - We decided to render the top half of the original wall as well. The new wall on the right is sure to be rendered, though it goes against the grain when you have such a lovely genuine cottage look, from original period bricks. You may be wondering about the arch on the left? And so you should, this of course needs to be blocked in or we could not fill the tank with water. This is the space between the inner and outer concrete walls of a World War Two air raid shelter. We don't want to spoil the history, so this needs special attention. We are blocking this chamber with two sheets of treated plywood, laminated together to give us 36mm thickness for strength and then caulked and bolted in place to a timber frame. The overhead gantry is to come next. Copyright © May 1 2016, all rights reserved. You will need permission from Bluebird Marine Systems Ltd to reproduce this photograph.
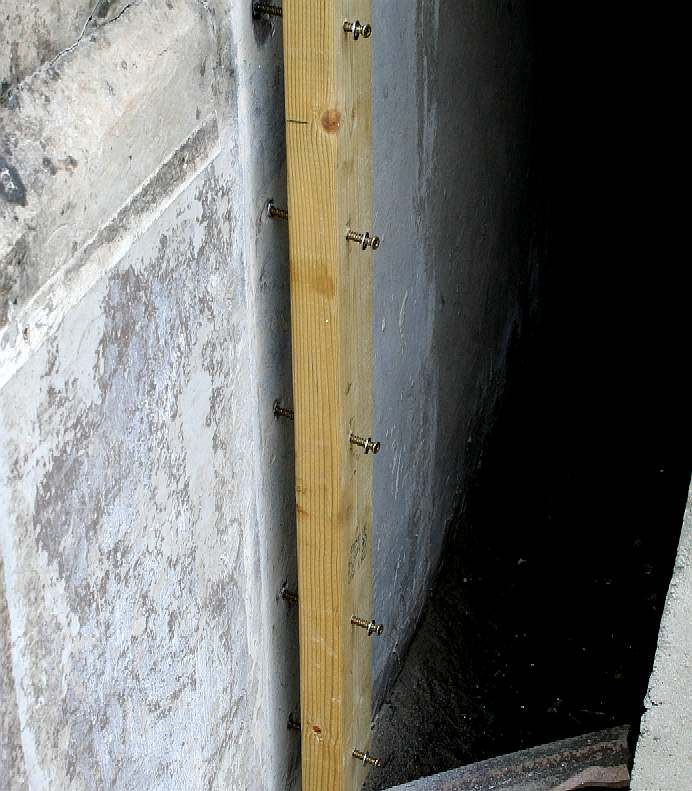
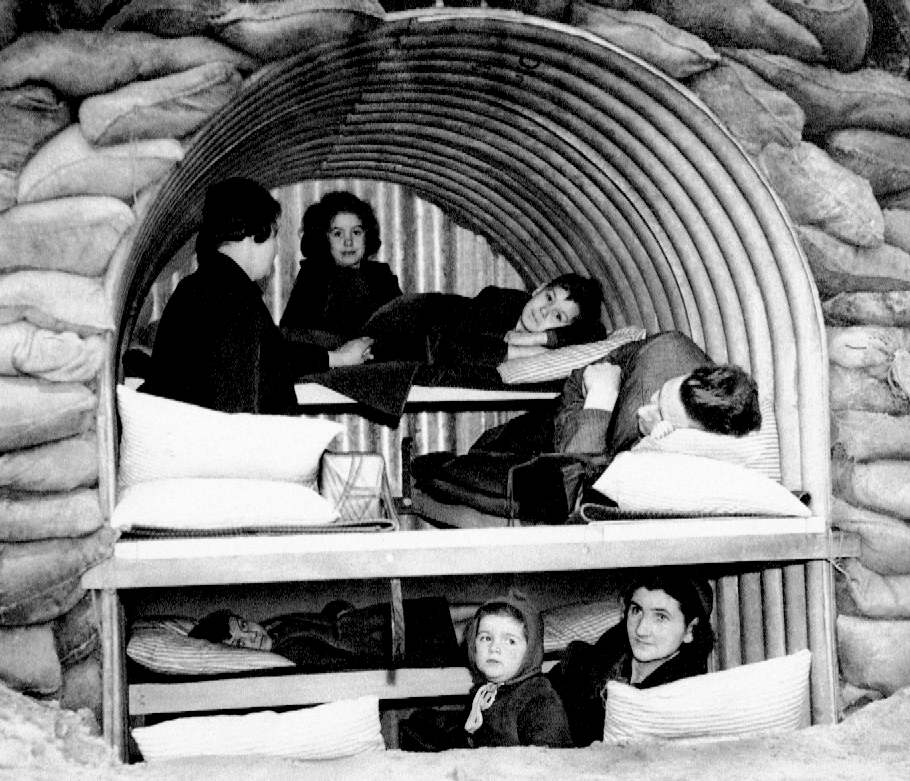
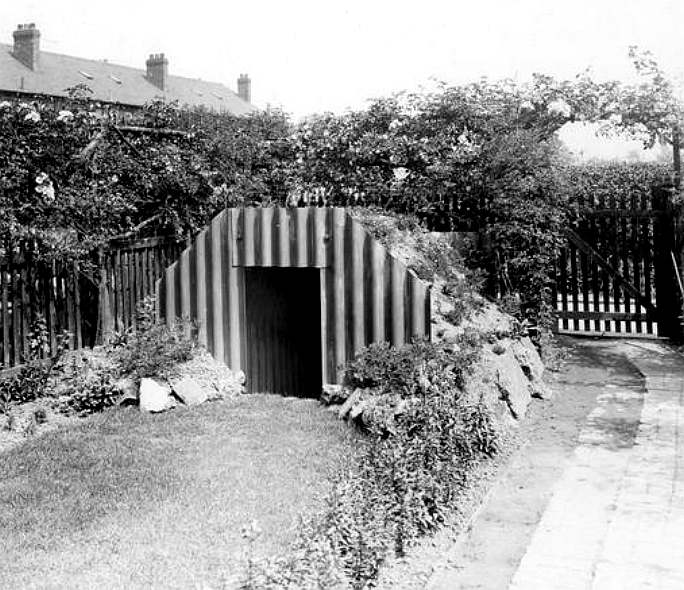
WWII ARCHAEOLOGY - Here we see the timber frame going in. It has to be pretty strong, so we used some serious screws, deep seated in the concrete with heavy duty wall plugs. They had to be tightened up with a spanner, a screwdriver would not budge them. The treated timbers were also bonded to the walls and tight-fit noggins were inserted to push the timbers hard against the concrete. This is a deluxe World War Two air-raid shelter, incorrectly referred to as an Anderson Shelter, which in fact were made of corrugated iron. Air-raid shelters were also known as bomb shelters, structures for the protection of civilians as well as the military against enemy attacks from the air. If the world is ever crazy enough to go to war again (please don't) it's nice to know that this building could provide protection. In fact there is a nuclear blast chamber elsewhere on the grounds. But that is another story.
ANDERSON SHELTER
- The Anderson shelter was designed in 1938 by William Paterson and Oscar Carl (Karl) Kerrison
as a result of a request from the Home Office. This design was named after Sir John Anderson, then Lord Privy Seal with special responsibility for preparing air-raid precautions immediately prior to the outbreak of World War II, and it was he who then initiated the development of the shelter. After evaluation by Dr David Anderson, Bertram Lawrence Hurst, and Sir Henry Jupp, of the Institution of Civil Engineers, the design was released for production.
BLANKING PLATE - The timber frame was blocked up at the bottom with engineering bricks and a very strong mortar mix (not shown in this picture - see above), being careful to keep the clay drain pipe that vents the chamber clear. On the right of the timber frame you can see the earlier plywood that blocked this feature. Being untreated, the plywood only lasted 15 years. These remnants will be used as patterns to cut the new blanking sheets. Copyright © May 23 2016, all rights reserved. You will need permission from Bluebird Marine Systems Ltd to reproduce this photograph.
BLANKING PLATES - Two sheets of treated plywood were cut to shape, tanked on the rear and then fixed into position with stainless steel screws and washers - finally to be caulked in situ, as you can see in the picture above. The reason for using two separate sheets was so that the top half could be undone for inspection and ventilation, leaving the lower sheet to retain water. Copyright © May 25 2016, all rights reserved. You will need permission from Bluebird Marine Systems Ltd to reproduce this photograph.
TRADITION - Back at the quarry face and the going was tough. Sometimes all the modern tools in the world will not get the job done as well as a bolster and club hammer. The same technique was employed here as for rock blasting. Holes were drilled, but instead of using blasting explosives, well aimed blows directed the hammer shocks to good effect. Copyright © May 9 2016, all rights reserved. You will need permission from Bluebird Marine Systems Ltd to reproduce this photograph.
THE ROCK FACE - More holed are drilled with an extra long SDS bit. You can see how strong these engineering bricks are from the dense clay. Other bricks are ordinary strength, and being hand made, vary in composition - so come out far easier. Copyright © May 9 2016, all rights reserved. You will need permission from Bluebird Marine Systems Ltd to reproduce this photograph.
QUARRY DEMOLITION - The line of drilled holes are obvious from this picture, as is the mix of brick types. Mind you, we are re-using as many original bricks and the mix of engineering and plain is roughly the same. The wall and step face can now be rendered for a smooth surface on which to apply masonry paint. Copyright © May 9 2016, all rights reserved. You will need permission from Bluebird Marine Systems Ltd to reproduce this photograph.
CONCRETE STEP - There was a layer of bricks above the slab level here, set on a concrete base - we think for a sink in the cottage C. 1900. An SDS makes light work of such removal. The concrete has to be lowered by around 30mm in order to apply a screed of sharp sand mix to blend in with the existing floor. A club hammer and bolster is used to trim down any high points. Copyright © May 14 2016, all rights reserved. You will need permission from Bluebird Marine Systems Ltd to reproduce this photograph.
SEAVAX TEAMWORK - In this picture you can see the first stages to replace the timber frame that was past its best. While the rest of the team were spreading render on the walls, our chippie was measuring treated wood and checking the angles. Wooden frames will be used for the entrance-ways and door frames. Stainless steel beams are for the water tank sections only. Copyright © May 15 2016, all rights reserved. You will need permission from Bluebird Marine Systems Ltd to reproduce this photograph.
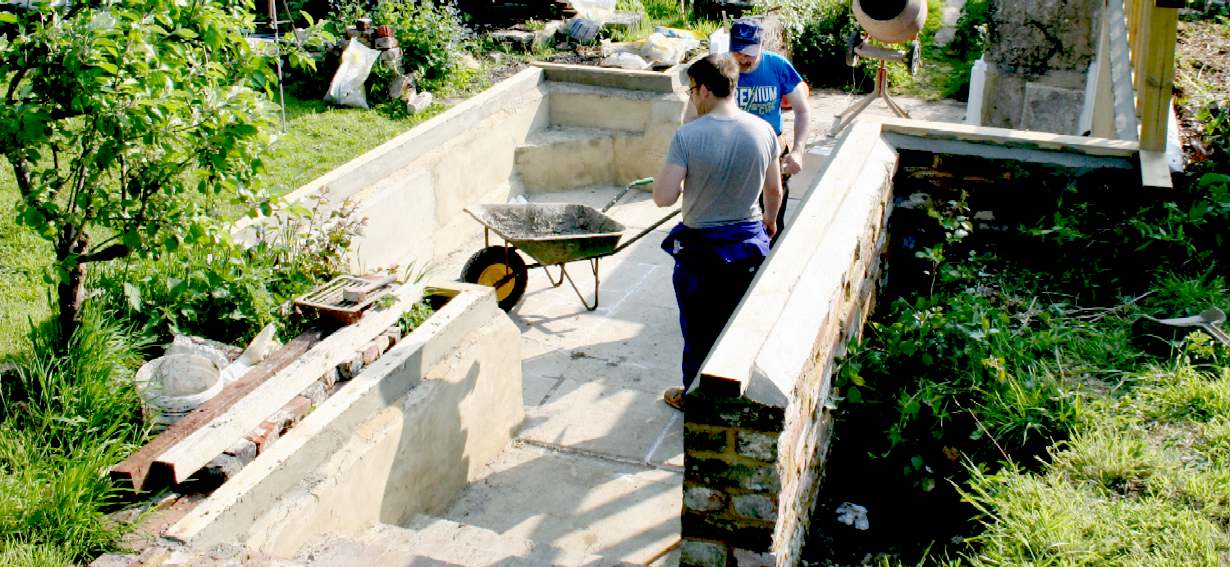
REMODELED STEP - That's better. The tank floor is now even, with a gentle slope for emptying purposes. Having a sluice gate means that we can empty our test facilities quickly, to refill with clean water. Most testing tanks are unable to deal with chemical or solids pollution issues - without it costing a fortune in water bills - and time of course. Copyright © May 15 2016, all rights reserved. You will need permission from Bluebird Marine Systems Ltd to reproduce this photograph.
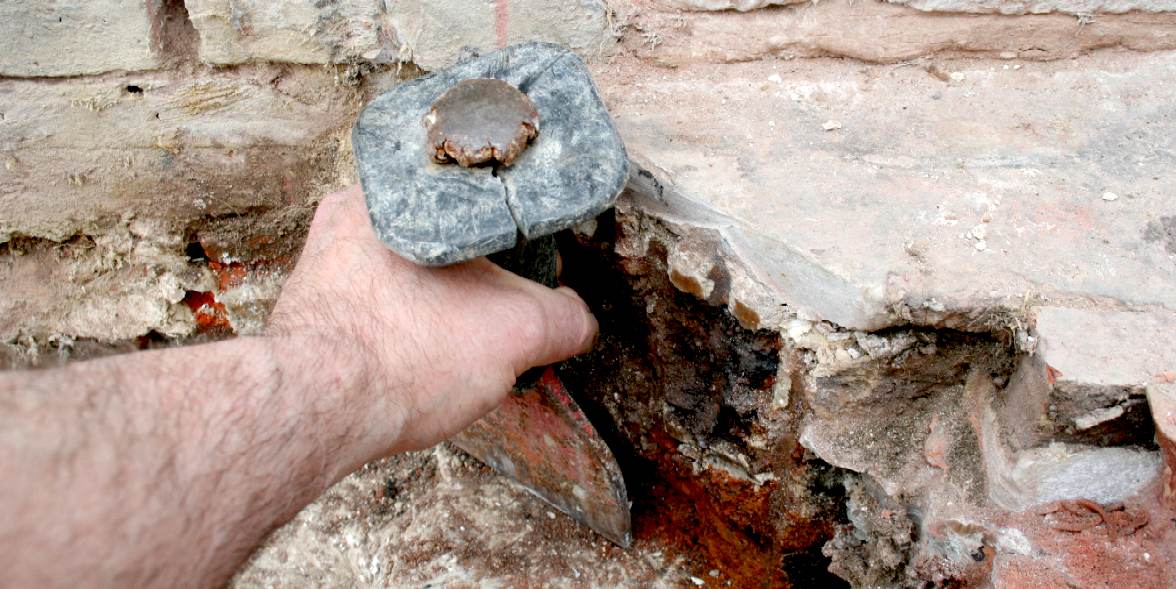
TIMBERS - The rotten frame was removed and replaced with treated timbers with a damp proof membrane painted on the underside. We used sharp sand and a strong Portland cement (Mastercrete) mix with lime and waterproofing admixture added, to bed the timbers in. This is much stronger than a conventional DPC. We also used steel pins as locators, pre-drilled into the brick wall. Copyright © May 28 2016, all rights reserved. You will need permission from Bluebird Marine Systems Ltd to reproduce this photograph.
CONCRETE - On the other side of the tank we used the same location and bedding system for the wooden frame wall plates. You have to work quickly as a team using this method. Copyright © May 28 2016, all rights reserved. You will need permission from Bluebird Marine Systems Ltd to reproduce this photograph.
RECIRCULATING WAVE - Without re-modeling the steps that were in the lower left hand corner of this diagram, we would not have been able to install the turning vanes to be able to use the tank in recirculating mode. In this mode we can measure the drag of a hull, or any other object, even those submerged, such as a submarine - and for a fraction of the cost of other facilities.
RENDERING
Unless your wall has been recently built, you will need to clean it well – remove any loose paint, and dust or loose debris, plants and moss. Then scrub off any mould with a bleach, or fungicide solution, and hose down the wall to remove any dust and dirt that could stop the render from adhering.
Our
walls are old and flaky, with weed growth. So, we needed to give it the Full-Monty.
We are treating this as an external wall. The render mix will then be: 3 parts cement,
to 4.5 parts soft sand, to 4.5 parts sharp sand and 1 or 2 parts of lime.
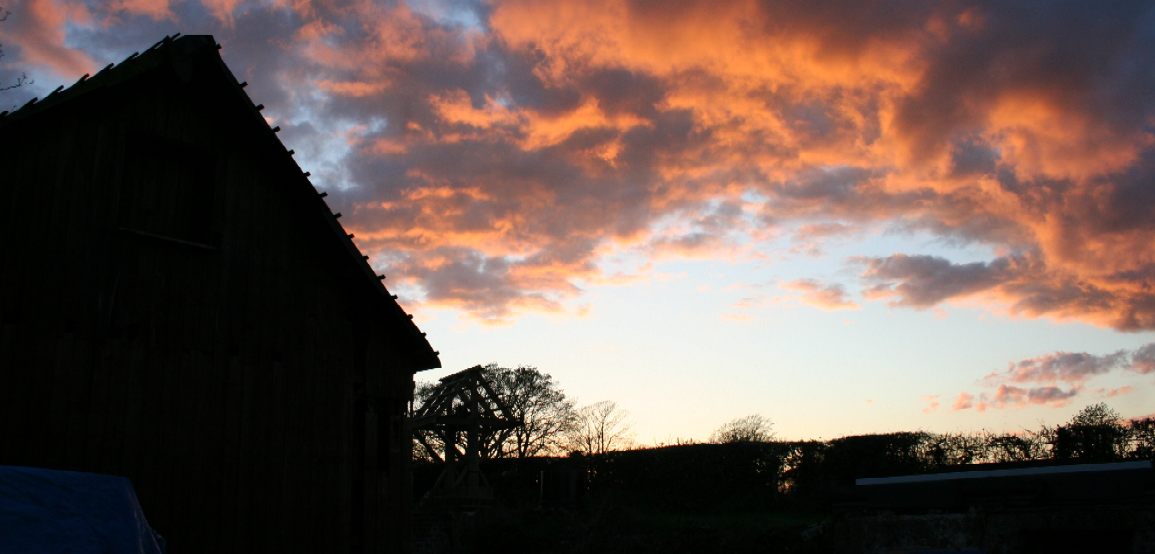
RED SKY AT NIGHT - Shepherd's delight, so the saying goes. It was a cold night, getting down to 2 degrees periodically. What you do not want is frost on you fresh cement. Frost and freezing temperatures kills cement unless it has reached cure - you'd have to start all over again. This picture was taken at around 8:00 pm after the final float finishing of the wall render. Copyright © April 17 2016, all rights reserved. You will need permission from Bluebird Marine Systems Ltd to reproduce this photograph.
LINKS & REFERENCE
https://avaaz.org/
BRICKS & MORTAR - DRAINAGE - FILTRATION - GLASS & PAINT - GANTRY - HYDRODYNAMICS HISTORY - INSTRUMENTS - LABORATORY - LOGISTICS - OUR TEST TANK - SEAVAX TEST VIDEOS - SLUICE GATE - WAVE MAKING - WIND MACHINE
|
|||
|
This page is Copyright © 2018 Bluebird Marine Systems Ltd. The names Bluebird™, Bluefish™, Miss Ocean™, RiverVax™, SeaNet, SeaVax™, and the blue bird & fish in flight logos are trademarks. All other trademarks are hereby acknowledged.
|