|
SEAVAX™ - HOW TO PAINT A LARGE MODEL BOAT
|
|
|
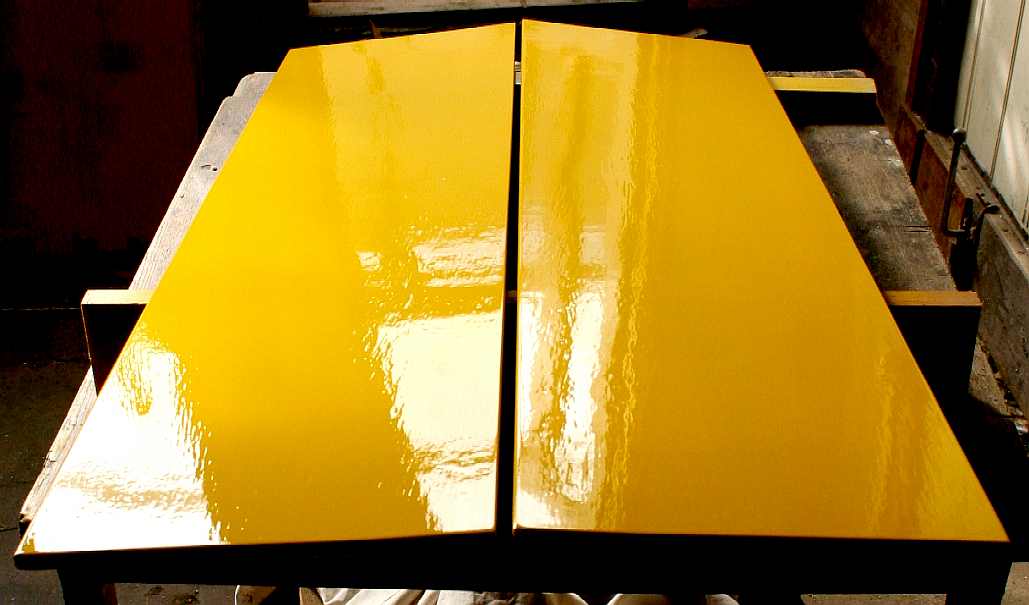
Looking more like a Klingon Bird of Prey than a robot boat, having painting your baby, you then have the fun of assembling it - carefully, so as not to ruin all your hard work getting it the right colour.
OCEAN ENTERPRISE JAN - MAR 2015 - FEASIBILITY STUDY
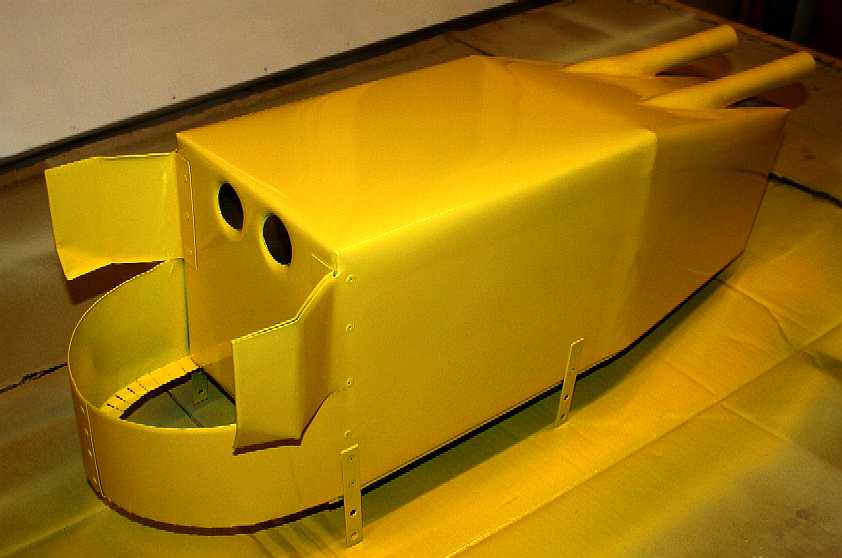
The Ocean Enterprise MK1, is a 1:20 scale model of the proposed 'SeaVax' autonomous, solar powered ship that is designed to vacuum plastic waste from the world's polluted ocean gyres and recycle the harvested plastic soup into a clean burning diesel fuel that is suitable for cargo ships. All shipping now has to run using cleaner fuels because of MARPOL legislation. On this page we are concerned with painting the newly built hull with the added complication of three different materials - all needing to be colour matched.
There it was, ready for painting. But how and how much? Painting a hand held model using brushes and mini tins of paint, such as the enamels sold by Humbrol or the acrylics sold by Tamiya - might cost a few pounds. Painting a 2 meter model and wanting a professional finish is another matter. You will need a good supply of production abrasive paper in different grades. 40 grit is the starting point, going down through 60, 80, 120 and 240 grits. We would not suggest using wet and dry papers on wood, (where the grit size might be as small a 400 or even 1000 grit) because water will expand the grain and paint will not adhere to damp timber. Also, let's face it, 1000 grit is a polishing paper used to remove minor imperfections in topcoats. We know from experience that 400 grit wet & dry gives us the same surface finish as 240 grit (dry) production paper - sanded in a powdered environment.
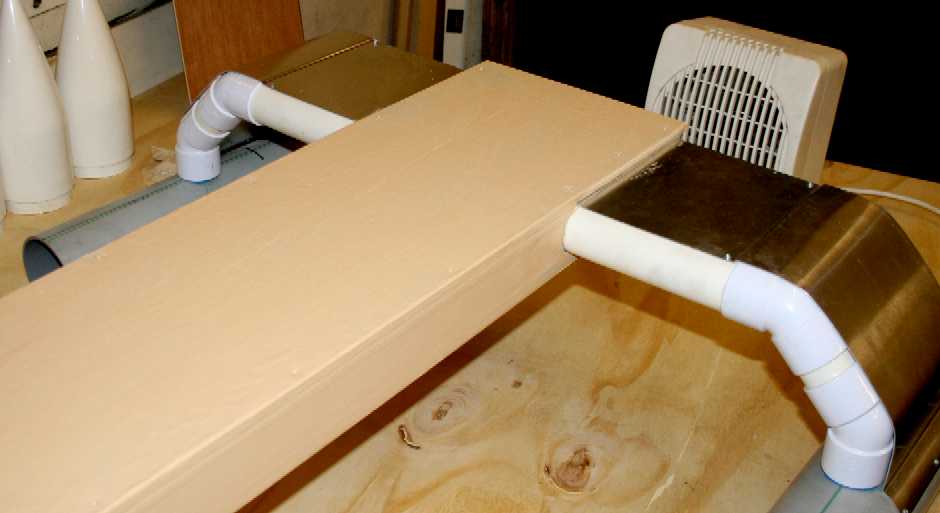
Though using marine plywood and tanalised softwood, hence virtually rot proof timber, we are sealing and painting the hull superstructure. The whole unit is sanded and wiped clean, then a thinned coat of two-pack primer is brush applied, building to a full coat - to act as a grain filler. This will be sanded smooth and another coat of universal white primer spray applied. Gloss paint will be applied eventually, but plastic and aluminium normally need their own special (etch) primers to get a good key - before we get to the topcoat. Our boat building team work just as well full size (not in our yard), though we will probably employ the services of specialist aluminium and composite builders for the full size sub-assemblies. To speed things along. The oceans will not wait.
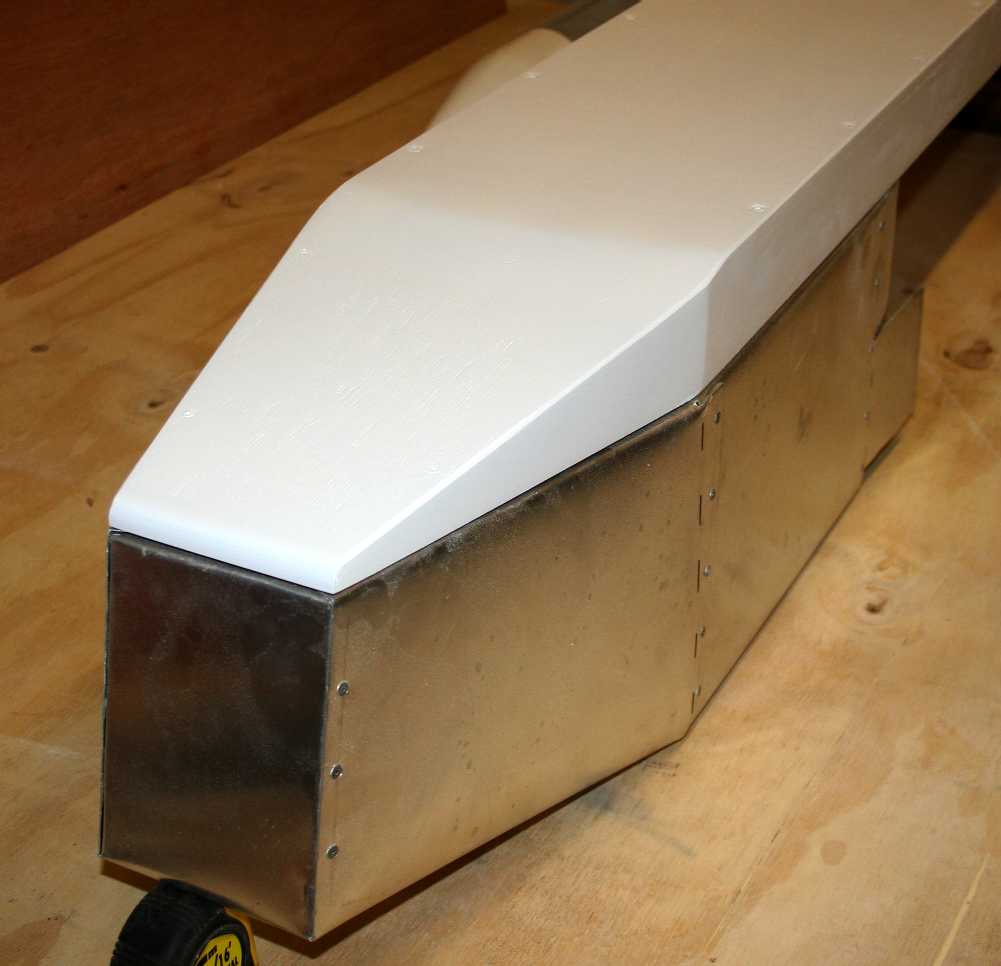
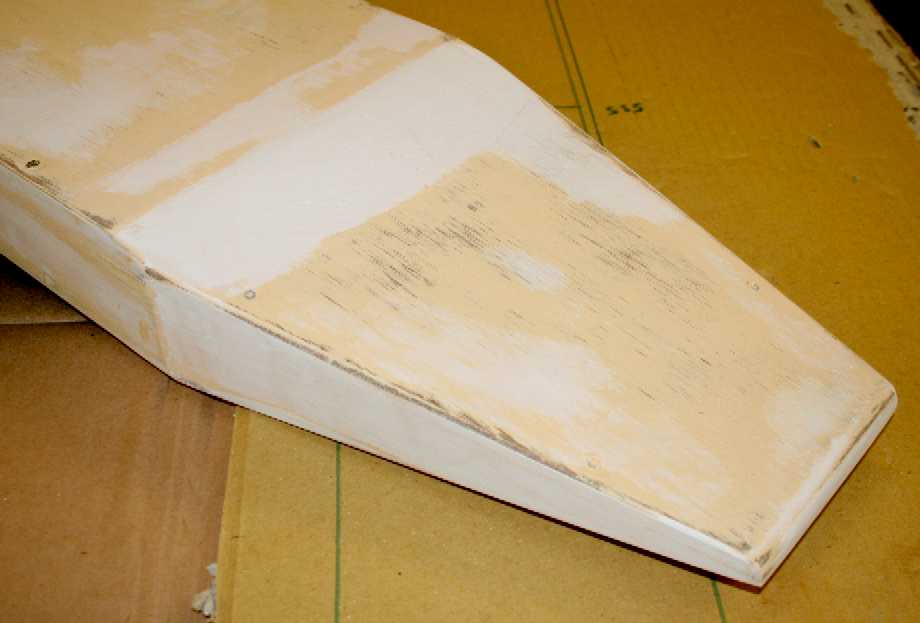
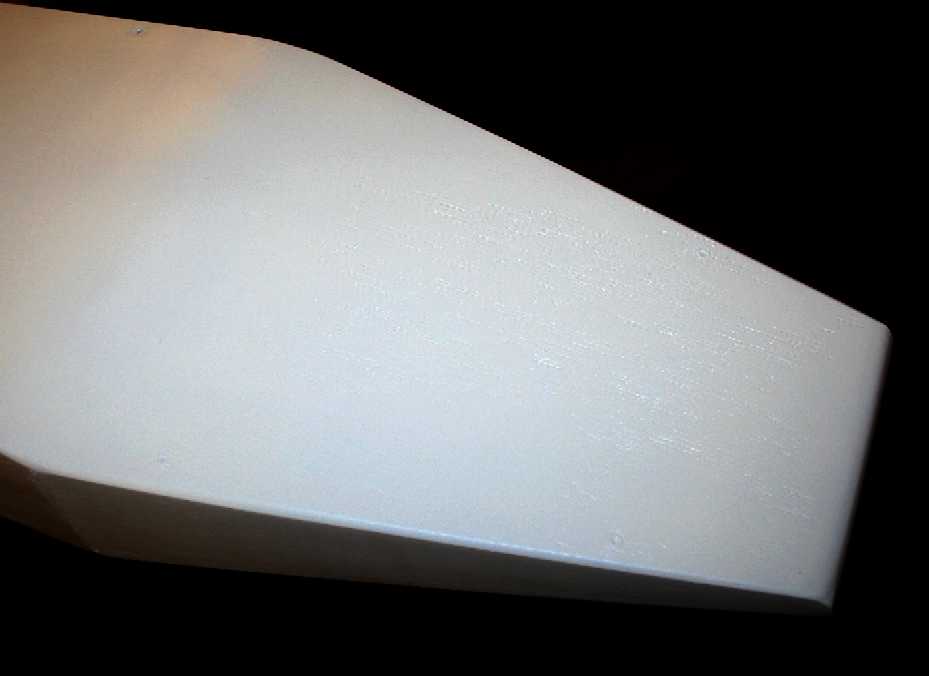
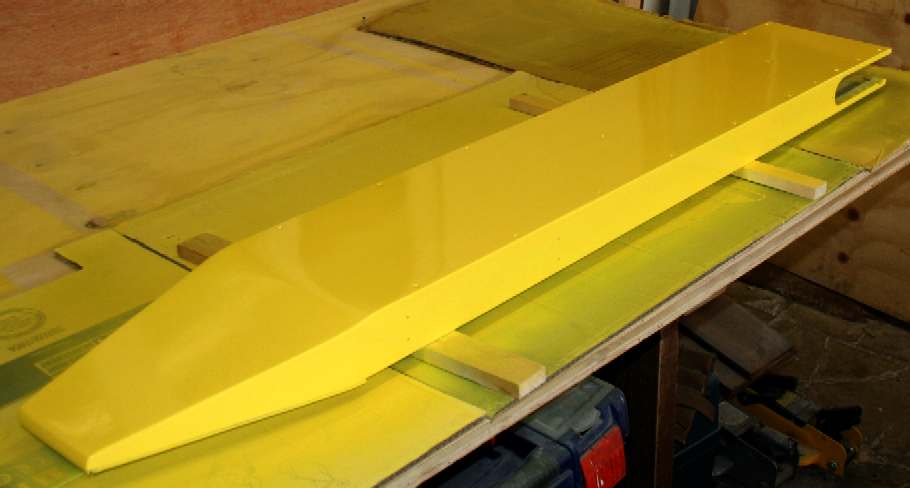
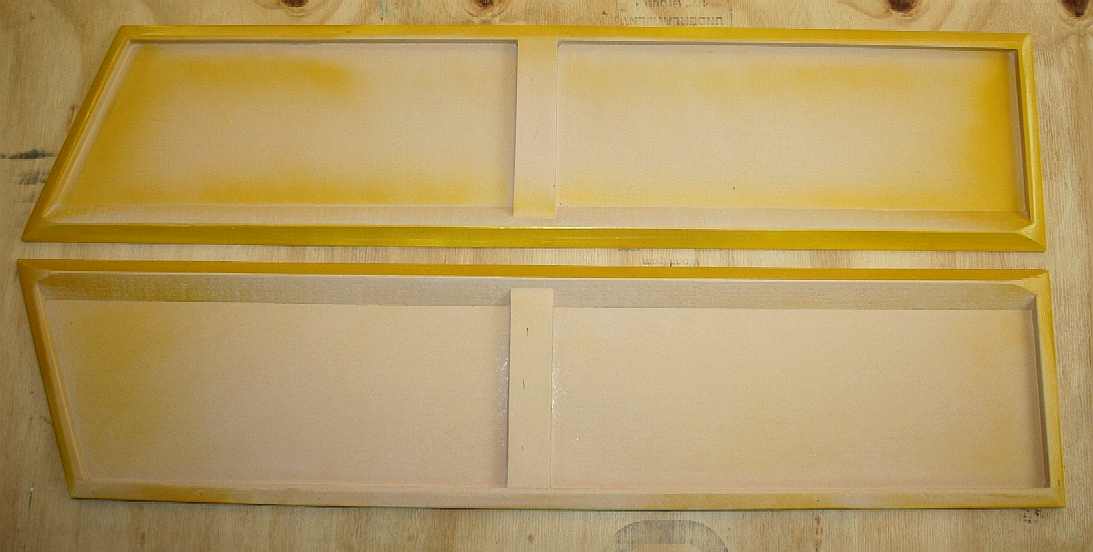
LEFT - Finally, the deck (superstructure) end piece is rough shaped using 80 grit and 120 grit abrasive papers, tapering to the transom. We're not sure if this panel should be hinged or otherwise removable for quick access to the onboard electronics. This is after all a development robot, and is bound to need a lot of solid state tinkering - at least via a USB interface. RIGHT - The deck primed and ready to be affixed to the aluminum hull. 23-2-15 We have provided a guide should we need to remove the end panel for easy access - as we may discover in use.
The painting sequence is: shaping, priming and surface filling. We use different colour primers to differentiate between coats for a guide while sanding. This is followed by a white primer coat and a high visibility (ocean machine yellow) gloss topcoat. Serious imperfections in wood or aluminium can be filled with ordinary automotive polyester body filler. With most of these surfaces covered in solar panels, we don't need a showroom finish, just a good solid layer of paint for protection, that is smooth enough to take solar panels. People often forget that paint is not just decorative, but also protective. If we were yacht building traditionalists, we'd have varnished the decks. We still can of course. Once primer has been applied, use 240 grit to sand (flat) in between coats. The term "flat" is preferred, because you should not see any shiny patches in between coats, you should see a completely matt surface for maximum physical adhesion. Do not confuse physical adhesion with chemical adhesion - as in wet on wet automotive paint finishes: base and clear coat. With such a paint system you only have a 10 minute window in between coats, or the clear lacquer will peel away from the base colour coat after a few years.
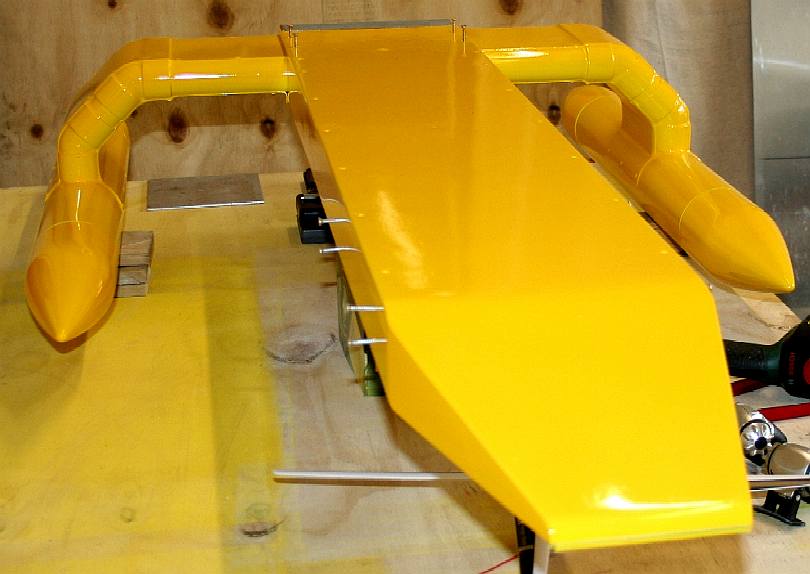
1. TOP - It was a weekend - so no chance of getting any paint on until Monday. Invert this hull and we are looking at a Starship configuration, with the twin hulls giving the impression of warp drives. Mr Roddenbury would forgive us. White it is then. 2. MIDDLE MONDAY 23rd Feb 2015 - Righto. The superstructure is finally primed in white. We'll let this harden before going much further. The next thing is to bond in the water duct exhaust tubes. Then the aluminium hull can be sealed and primed. The boat will be white for some tests and publicity shots, then it will most likely be painted 'oceanographic' yellow, for high visibility at sea. 3. BOTTOM - The sponsons are primed in white. Sponsons are projections extending from the sides of a land, air or water craft to provide stability, storage locations, mounting points, or equipment housings. Sponsons extend a watercraft hull dimension at or below the waterline to increase flotation or add lift when underway. In this case the sponsons are for stability and to provide flotation. Click on the pictures above to see the launch of the feasibility model to test hull integrity, etc.
TOPCOATS - Now the hull is float tested, we need to complete the paintwork to be able to fit her out. It's a laborious process. Primer then two coats of gloss topcoat and 48 hours in between each coat. Still, that gives us time to work on the vacuum head and shredding plant. We may even spare ourselves a moment to begin the improvement patent draft, because in building this little beauty, we've already discovered some of the secrets to make the full size prototype a very versatile craft - and we'd like to be able to share some of this with potential backers - which at the moment we cannot, save under cover of a Non-Disclosure Agreement - and those take time to put in place.
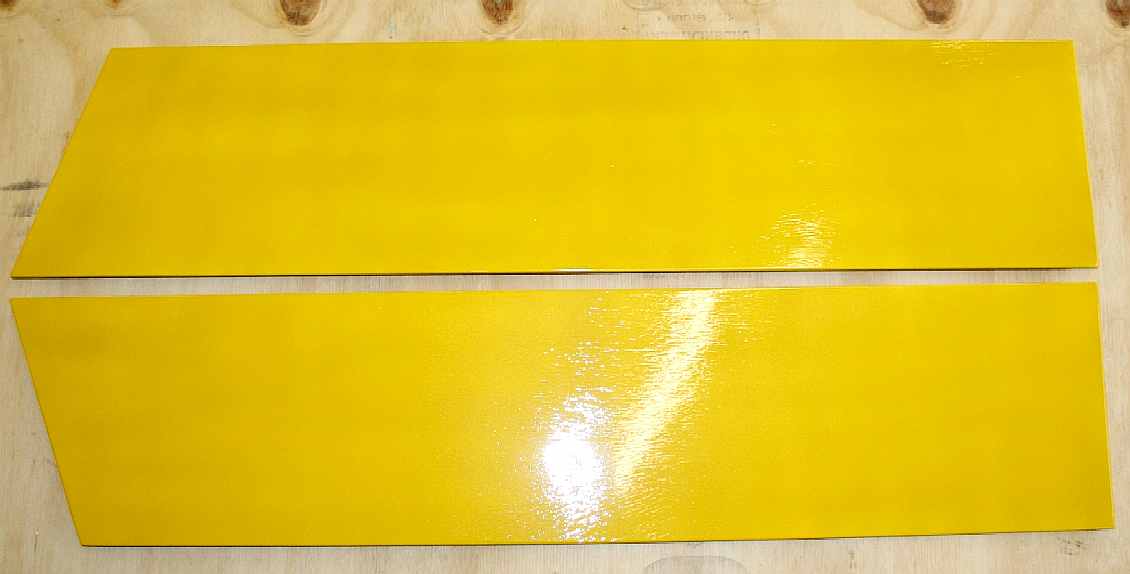
The deck or superstructure gets its first coat of yellow topcoat. Flat surfaces are easier to prepare, with almost no possibility of getting any runs. Spray painting is a skill. If you spray in the wrong sequence, you will not get a full gloss coat. Work backwards, from the inside out. In this case we did the far side first, then the near side, ending with the flat deck. Paint with even strokes across the deck from end to end, then from side to side - ending with a generous final coat from end to end. The paint should appear wet and smooth, not dry speckled or spattered. If it is not wet looking, your are not applying enough paint. If there are runs, you are applying too much paint. Practice makes perfect.
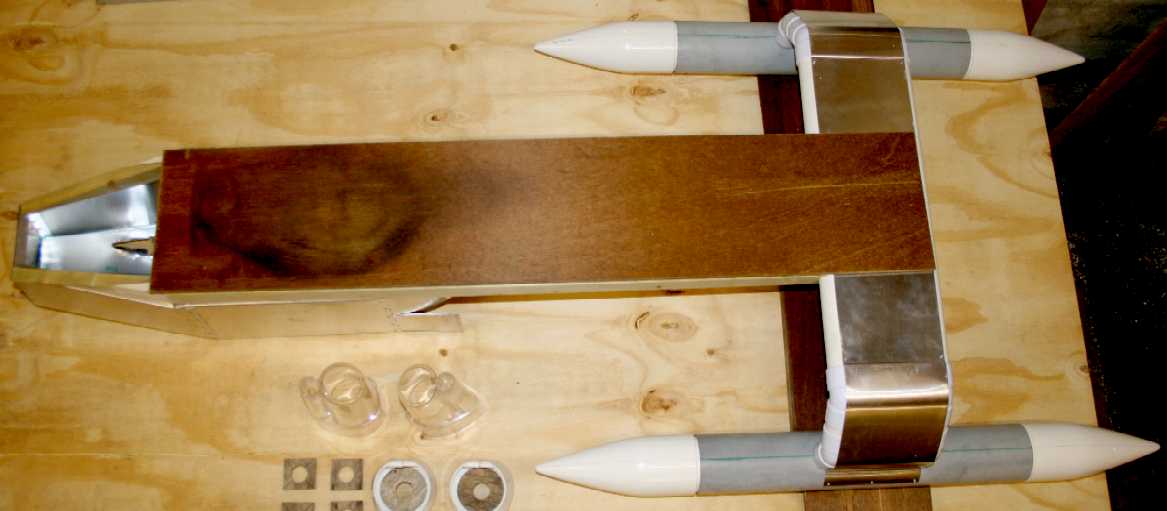
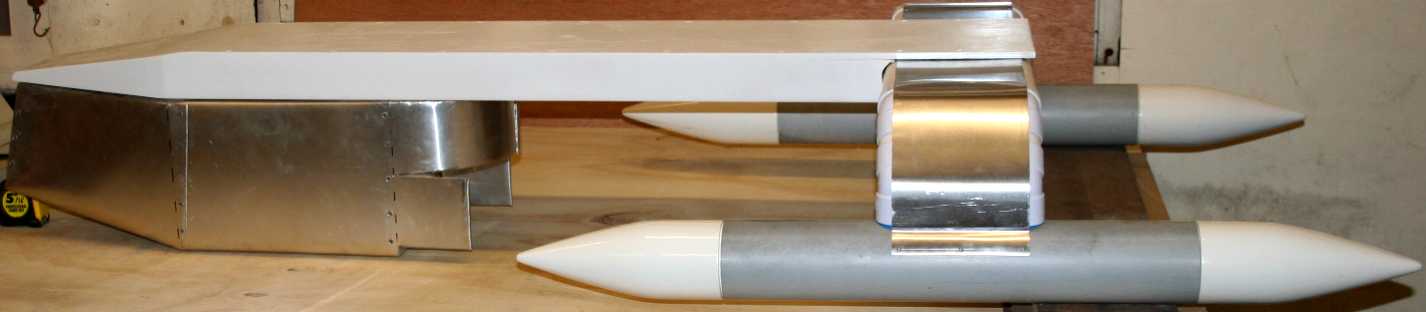
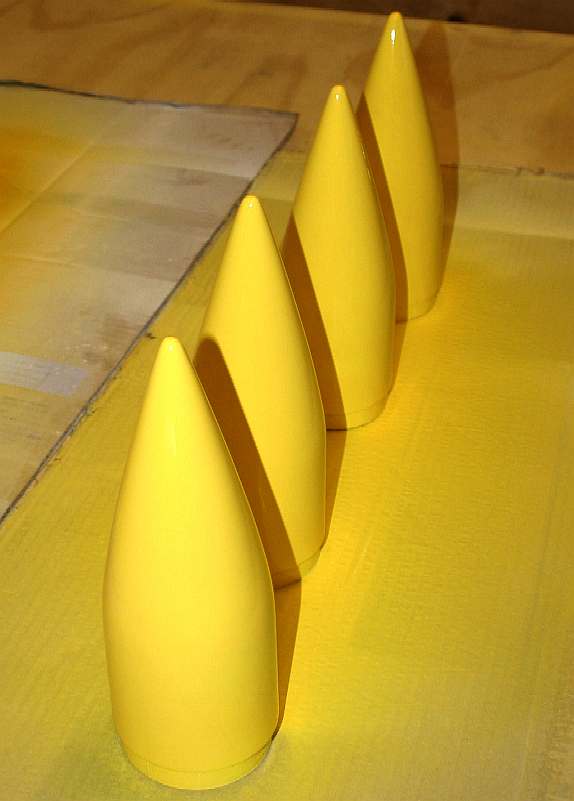
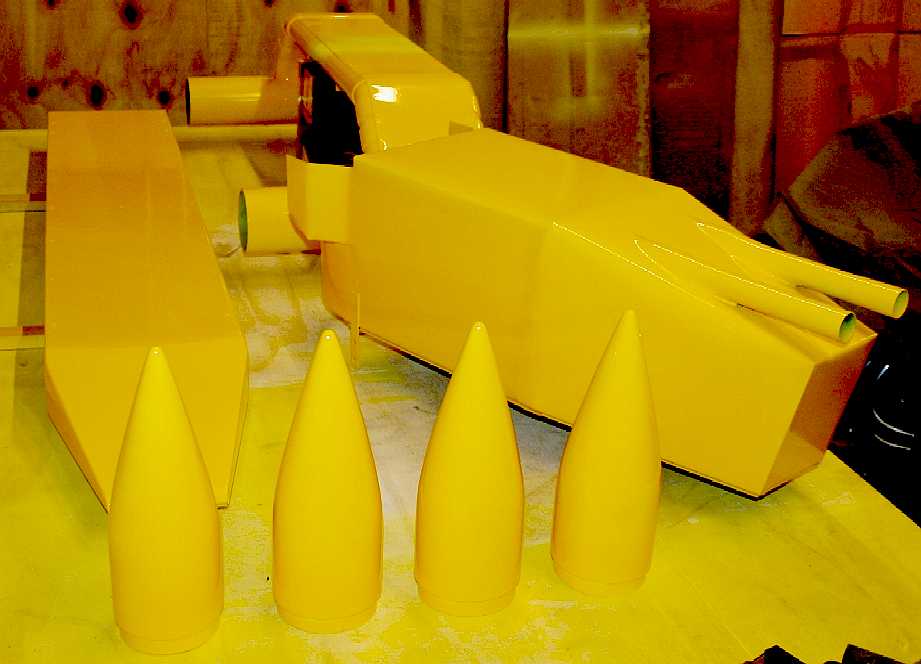
The cones for the front floats are custom build fiberglass from our old friends at Pevensey Bay Marine, as made from the moulds for a SWATH hull from some years ago. They needed to have the mould lines removed and the gel coat flatted to a nice matt surface for a good key. Normally with GRP, one would have the product moulded in the colour of the end product, avoiding the need for painting. We needed the cones to be a perfect colour match to the rest of the hull - so had to paint them.
MOULD MAKING - The production process for these cones begins with a lathe turned wooden plug. The plug is then sealed and coated with resin so that the grain is no longer a feature. From the plug, we make a mould from which we produce a master, that we can add features to - such as the internal location rim. Finally, a two piece (split) mould is made from the master, to enable a production run. Note that the internal surface of the mould is highly polished, then coated with release wax and polished again in between each moulding session. Five bolts are used to secure the split mould while curing and there are two location buttons on each mould half to ensure accurate alignment. With (slow) curing time it takes around 7 hours to produce four cones. The same moulds can be used for carbon fiber or GRP.
The Enterprise 1 component parts were baked in a conservatory using free sunshine as the heat source. This process was repeated for primer, undercoat and gloss topcoats. The sponsons are shown here perched high up on a handy item to be cured faster.
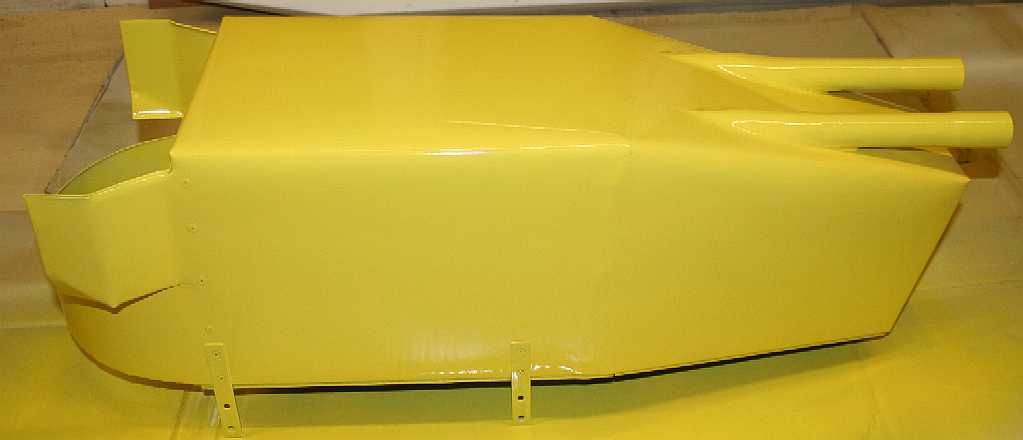
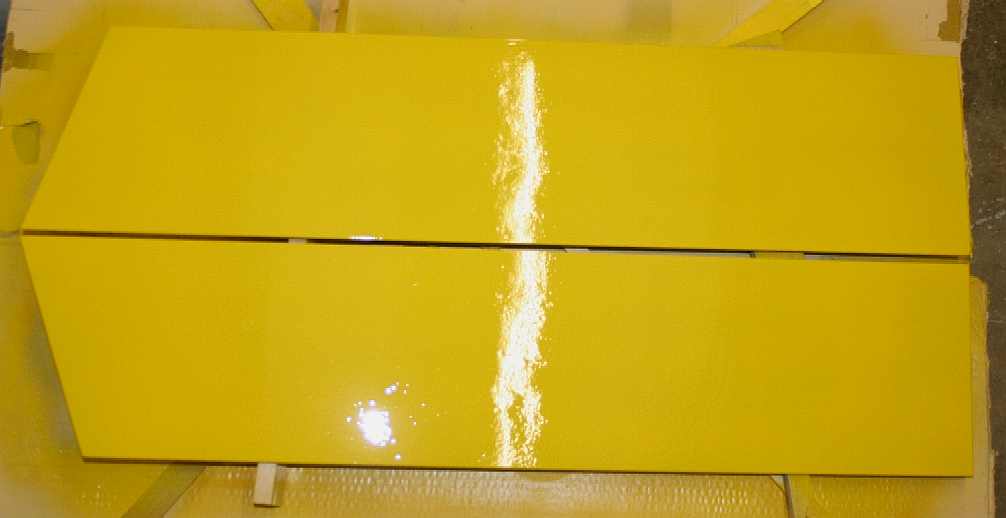
ARE WE THERE YET - Nearly. The main hull is now in ocean machine yellow. The deck, cones and sponsons are in a lighter shade called 'sunshine yellow.' Why is that? We found the right colour yellow in a Valspar® premium enamel range from B&Q. Unfortunately, for us that was £8.98 for a 340ml can. Whereas, the same quality of paint (in a lighter shade) was £5.49 per 340ml can by Plastikote, as stocked at the Range. We needed two cans of each colour to get two full gloss coats for environmental protection. By using the lighter colour as the first gloss coat we saved £6.98. The total gloss paint cost came to £28.94. Both the Plastikote and The Valspar® enamels are easy to spray paint - just as they claim, with smoother coverage and no recoat window. Though PLastikote don't claim this, the can has all the same features as the Valspar® product. A large finger pad on these cans reduces the effort needed to paint by about a third, though you may still get a tired finger when using more than one can in a row as we did - cured by changing hands frequently. Our extremely versatile painter is ambidextrous. The new multi-surface formula eliminates the "recoat window" associated with many other spray paints. You can add another coat in an hour... a week... or a month, without causing a reaction that would normally wrinkle the first coat. Your projects get done faster, to your schedule.
Primers were a better deal from B&Q at £4.98 per 400ml can. We used four cans = £19.92. Total paint costs = £48.86. A lot for a young hobbyist on pocket money and short of patience. We had fillers, sanding papers and 2-pack primers in stock, so did not count those costs. So add another £40 to your budget if you need these items. The B&Q primers stuck fast to wood, plastic and aluminium and sanded smooth after 24 hours drying time without dragging. The only real drawback with this type of paint is the hardening time. While tack dry in 20 mins, it takes at least 48 hours to fully harden. Two-pack takes about an hour with heat cure, and its ready to rock.
PAINTING & SEALING - We had problems with bleed through using cellulose primer to seal the woodgrain, that was ready to flat off in under 30 minutes - using our solar conservatory as a baking oven. The cure was a white blocker coat, followed by an acrylic (automotive) paint from Halfords that did not really cut the mustard. The paint did not cover well and had a splotchy spray pattern that made it hard to get an even coat, even for an experienced spray painter. You can see the lines above after two coats at ninety degrees, then four coats. We'll need to flat this off and give it another full coat - when the whole idea was to save time with a quicker drying paint. We feel sorry for anyone trying to match a panel on their car using this paint system. To cap it all the colour on the lid, did not match the colour in the can. We've had that before with this kind of paint.
TAKE TWO - That's better. We ditched the Halfords car paint, that cost us a lot of time and effort. Unfortunately, a return to the enamel system from Valspar means baking in our solar furnace for a while longer before we can handle the wings. Next, we'll mark out the areas for the solar cells, to make our arrays. These will be moved by jumbo servos with a whopping 20kg of torque, coordinated by an Arduino program, to track the sun.
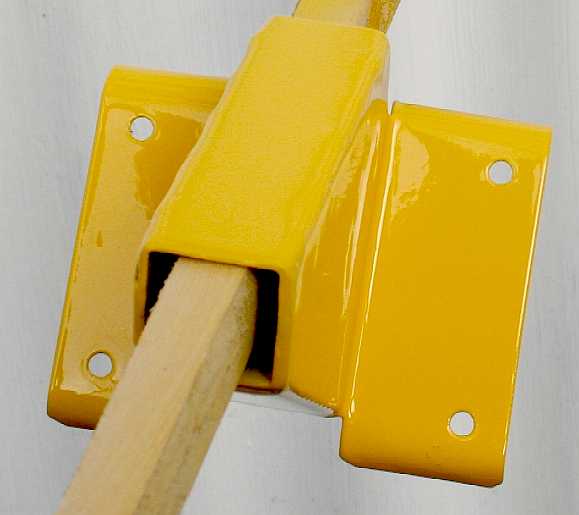
PROW MAST MOUNTING - This is one of the smallest parts needing a coat of paint. Being made of steel, it is important to give at least two topcoats, to prevent the Captain's nightmare of rust streaks, especially unsightly on a white painted hull.
DECK-PROW MAST MOUNTING PLATE - The mast mounting above bolts to this steel plate that caps the deck at the front of the vessel. This plate transfers the stresses of the wind turbines to the front hulls over a wide area to prevent high point loading.
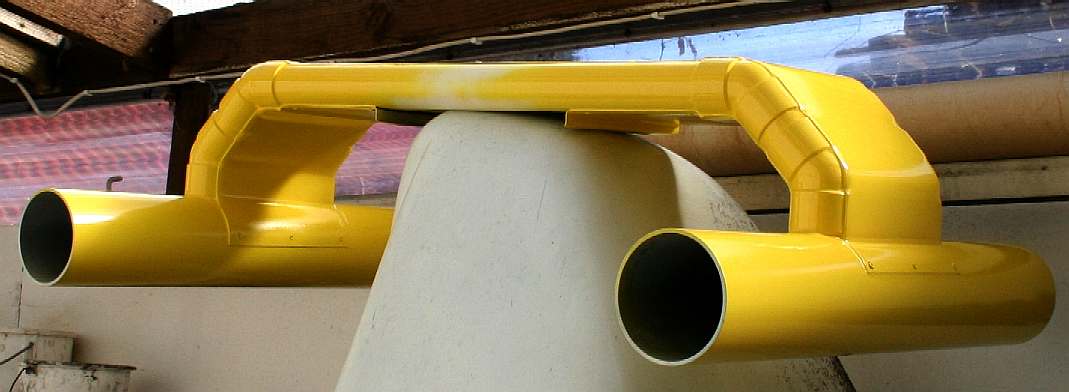
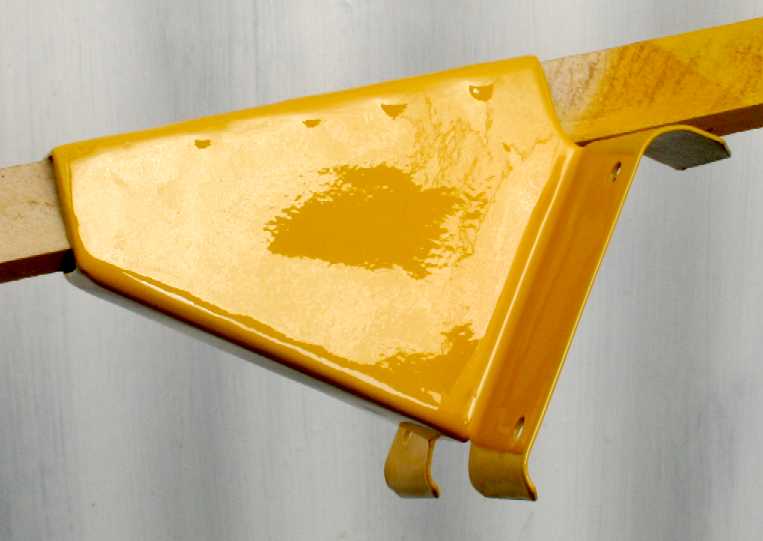
UAS HELIPAD - Another aluminium structure that is an accessory that bolts to the rear of the main hull, to give us a landing pad for unmanned aerial vehicles, to add advance scouting to the ships abilities. Ideal when operating in troubled waters, such as the Horn of Africa, a favourite haunt for pirates. Not only might drones video record acts of piracy, but they may also temporarily blind marauders and if that fails, stun them.
SORTED - All done. Incidentally, cellulose, is somewhere in between when it comes to cure time, but you use a lot more cellulose paint to get a full coat because it air dries so quickly. Hence, you use more cans at greater cost for the same amount of paint on the product. Even so, as you can see there is a lot of over-spray dust in the workshop, and that is with the extractor fans running.
Doing the same job using car paints from Halfords, would have cost a great deal more because of the area, even with a trade card. If the area had been significantly more, it would have been cheaper to go over to 2-pack yacht/automotive paints. Here you would need primer, thinners, hardener and topcoat, raising the bar well over £100 for starters - and it's all done by mail order these days, so add postages. In the old days we just popped down to our local spray store who would mix any 2-pack colour for us on the premises. Halfords offered a similar service, but stopped it because of new EU H&S regulations. This was the best paint that Halfords ever supplied in our opinion.
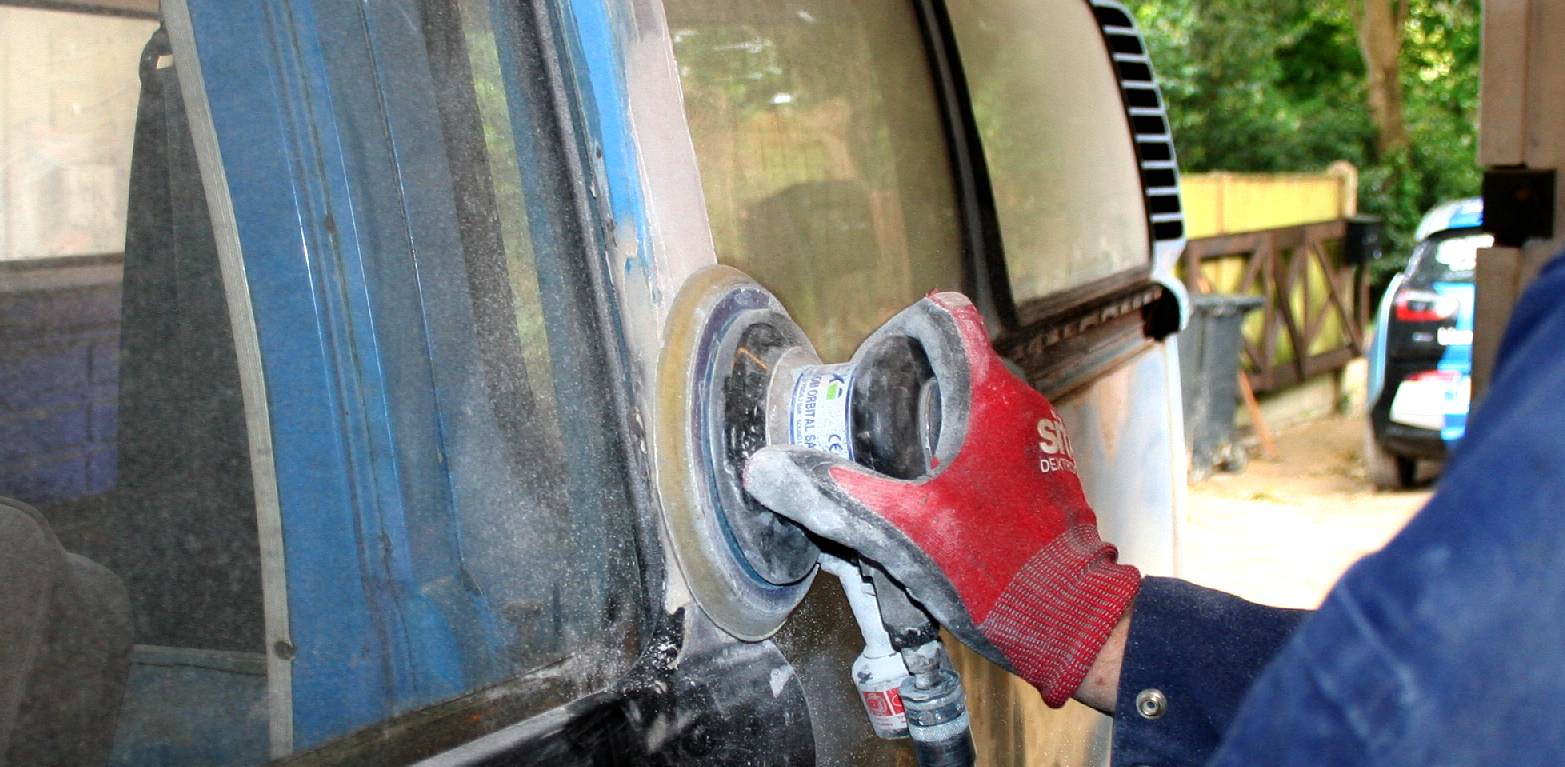
TOUR BUS - Painting the SeaVax model is different in scale to painting a Volkswagen camper van. The larger scale dictates using mechanical equipment to speed up preparations, such as this orbital sander. Always wear a mask when working in dusty conditions. We use electric flatbed sanders as well. We don't paint cars or vans in our workshops. We simply cannot spare the space or time when we are working on the AmphiMax and SeaVax prototypes. That is after all why we are going to all the trouble of sorting the tour bus in this picture for the Cleaner Oceans Foundation. Copyright photograph, 3 May 2017, all rights reserved. You will need the permission of Bluebird Marine Systems Ltd to reproduce this picture.
LINKS
http://www.hempel.co.uk/en-GB/marine/products http://www.tamiya.com/ http://www.diy.com/ http://www.therange.co.uk/ http://www.plasti-kote.co.uk/ http://www.halfords.com/ http://en.nioc.ir/ http://www.saudiaramco.com/ http://www.shell.com/ http://www.rosneft.com/ http://www.exxonmobil.com/ http://www.gazprom.com/ http://www.petrochina.com.cn/ http://www.pemex.com/ http://www.chevron.com/ https://www.kpc.com.kw/ http://www.petrobras.com.br/ http://www.total.com/ https://www.qp.com.qa/ http://www.adnoc.ae/ http://www.bp.com/ http://www.lukoil.com/ http://www.statoil.com/ http://www.pdvsa.com/ http://www.nrc.oil.gov.iq/ http://www.sonatrach.com/
Youtube
ARCTIC - ATLANTIC - BALTIC - BERING - CARIBBEAN - CORAL - EAST CHINA - ENGLISH CH - GULF MEXICO GOC - INDIAN - MEDITERRANEAN - NORTH SEA - PACIFIC - PERSIAN GULF - SEA JAPAN - STH CHINA PLASTIC - PLASTIC OCEANS - RISING SEA LEVELS
OCEAN POLLUTION - Our love affair with plastic is choking the oceans. Once people know about it, they want to stop it. But how? The next question is who? Obviously, if any of the researchers involved so far had come up with a solution, they would have sorted it years ago. We are a practical think-tank fresh to the issue and without a budget. We hope to be able to collaborate with other marine organisations that are funded for this work, or who have funds to investigate viable projects. You cannot donate to us directly on this site, but we hope to identify partner sites shortly where you can support a project much like that proposed herein, or better still, our own practical experiments. Volunteer careers.
|
|
|
This website is Copyright © 2017 Bluebird Marine Systems Ltd. The names Bluebird™, Bluefish™, Miss Ocean™, SeaNet™, SeaVax™ and the blue bird and fish in flight logos are trademarks. CONTACTS The color blue is a protected feature of the trademarks.
|